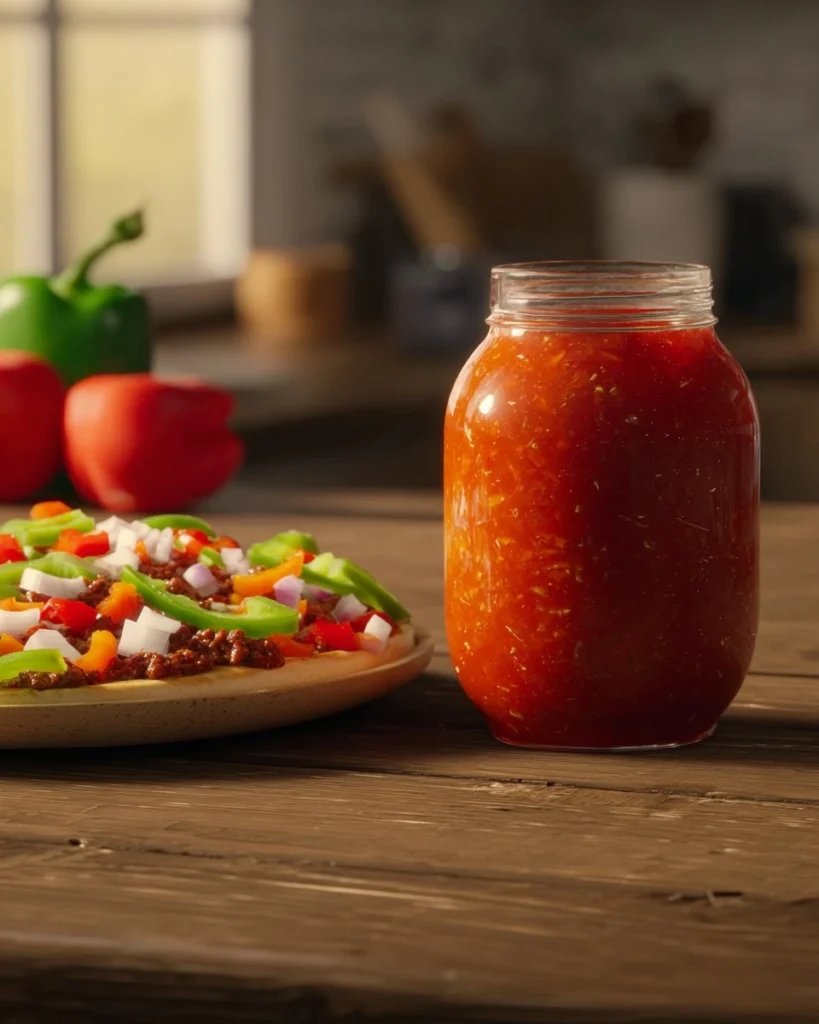
Fresh, vibrant, and bursting with flavor, this Sloppy Joe Starter is your new go-to for whipping up that classic dish we all know and love. Perfectly balanced with sweet and tangy notes, this homemade blend brings together finely chopped green and red bell peppers with tender onions and a zesty sauce that’s simple enough to whip up on a weeknight yet deliciously satisfying for any gathering. In today’s busy world, a quick, flavorful option like this Sloppy Joe Starter can save dinnertime from turning into chaos!

I still remember the first time I made a Sloppy Joe from scratch. The smoky aroma dancing through the kitchen was enough to have my family flocking from all corners of the house, eagerly anticipating a hearty meal. Unlike store-bought options filled with preservatives and additives, this Sloppy Joe Starter is made from wholesome ingredients. It’s not just easy; it’s downright delightful, turning typical ground meat and a bun into a centerpiece dish!
Why You’ll Love This Recipe
- Simple & Quick: With just 15 minutes of prep time and 65 minutes of cook time, you’ll have a hearty meal ready before you know it!
- Irresistible Flavor: The savory blend of bell peppers, onion, and tangy sauce will have everyone coming back for seconds.
- Eye-Catching Appeal: Those bright colors are not only beautiful but signal freshness and tasty goodness.
- Flexible Serving: Perfect for casual dinners, game days, or quick family meals that please everyone.
- Diet-Friendly Options: Easily adaptable to fit various dietary preferences and can be made vegetarian by using lentils or mushrooms.
Ingredients You’ll Need
- 3 cups finely chopped green bell pepper: About 2 large peppers, these add a fresh, vibrant flavor and a crunchy texture.
- 3 cups finely chopped red bell pepper: Also around 2 large peppers, they provide sweetness that balances the spices.
- 2 cups diced onion: Approximately 2 large onions contribute a savory depth to your starter.
- 4 tsp salt: Essential for enhancing the natural flavors of the veggies.
- 2 tsp freshly ground black pepper: Offers a gentle kick to wake up the taste buds.
- 1 can (6.0 oz) tomato paste: This thickens the mixture and gives it a robust tomato flavor.
- 4 cans (8.0 oz) tomato sauce: Adds moisture and a tangy base to the blend.
- 1 cup apple cider vinegar (5% acidity): Brings that desired tang, cutting through the richness beautifully.
- 1/2 cup Dijon mustard: Adds a sophisticated zing and depth to the sauce.
- 1/4 cup firmly packed brown sugar: Balances the acidity while rounding out the flavors with its sweetness.
How to Make Sloppy Joe Starter
- Prepare Your Jars: Begin by cleaning your canning jars and lids with warm, soapy water. Ensure there are no chips or bubbles in the glass that could ruin your seal.
- Wash Your Produce: Rinse all your vegetables thoroughly to remove any dirt and pesticides.
- Preheat Your Oven: Set it to 375°F (190°C) so it’s hot and ready for your veggies.
- Chop the Vegetables: Finely chop the green and red bell peppers, followed by dicing the onions.
- Prepare the Baking Sheet: Line a large rimmed baking sheet with aluminum foil and lightly coat it with cooking spray to prevent sticking.
- Bake the Veggies: Spread the chopped peppers and onions on the baking sheet. Sprinkle the salt and pepper over them, mixing well. Bake for 20 minutes until the vegetables are tender and slightly browned, stirring occasionally.
- Prepare Your Canner: If using a water bath canner, place your canning rack in it, and warm your pint jars while the water heats. Use enough water to cover the jars by 2-3 inches. For a steam canner, follow the manufacturer instructions for water levels.
- Combine in Dutch Oven: Transfer the baked vegetable mixture into an enameled Dutch oven or a stainless-steel pot. Stir in the 1 can of tomato paste, cooking over medium heat for about 5 minutes until the mixture thickens and the edges bubble slightly.
- Add Remaining Ingredients: Stir in 4 cans of tomato sauce, 1 cup of apple cider vinegar, 1/2 cup of Dijon mustard, and 1/4 cup of brown sugar. Bring this mixture to a boil to start combining those incredible flavors.
- Simmer: Lower the heat and allow the mixture to simmer uncovered for about 5 minutes, stirring frequently, until it thickens to your liking.
- Fill the Jars: When your jars and the sloppy joe starter are hot, remove jars one at a time from the canner using tongs. Ladle the hot starter into each jar, leaving a 1/2 inch (1 cm) headspace. Use a de-bubbler to remove any air bubbles, adjusting the headspace as needed.
- Seal the Jars: Wipe the rims of the jars clean to ensure a good seal. Center a lid on each jar and screw down the band to fingertip tight.
- Process the Jars: Place them back into the canner. For water bath canning, lower the rack and ensure the jars are covered with at least 2 inches of boiling water. Process pint jars for 20 minutes, adjusting for altitude. For steam canning, follow your canner instructions.
- Cool Down: After processing, turn off the heat and let the jars sit in the canner for an extra 5 minutes before transferring them to cool on a wire rack.
- Label & Store: Once cooled, remove the canning rings, wash jars, and label with the recipe name and date. The starter can be stored in a cool, dark place for up to a year.
Storing & Reheating
Store leftover Sloppy Joe Starter at room temperature for up to a year if properly canned. For opened jars, refrigerate in an airtight container for up to 2 weeks. You can also freeze the starter in freezer-safe bags or containers for up to 3 months. When you’re ready to enjoy, simply reheat it on the stovetop over medium heat for about 10-15 minutes until warmed through. Note that freezing may change the texture slightly, but a good stir should refresh the sauciness.
Chef’s Helpful Tips
- Avoid Overcooking the Vegetables: Keep an eye on your veggies while roasting; you want them tender, not mushy.
- Fresh Ingredients: Use fresh produce for the brightest flavors. This is not the time for limp peppers!
- Check Your Seal: After cooling, ensure the jar tops are domed and don’t flex when pressed; this ensures a good seal.
- Add Spice: For a kick, try adding some crushed red pepper flakes or a dash of hot sauce to the mix!
- Make Ahead: This Sloppy Joe Starter can easily be made a day in advance to save time on meal day.
There’s something truly rewarding about creating a Sloppy Joe Starter from scratch. It not only brings a nostalgic sense of comfort but also allows you to control what goes into your food. Whether you’re making classic sloppy Joes, adding it to casseroles, or enjoying it on top of baked potatoes, this starter is as versatile as it gets. I encourage you to experiment with flavors and ingredients, making this recipe your own! Enjoy every bite, and don’t forget to share your creations with family and friends.

Recipe FAQs
Can I substitute the bell peppers?
Absolutely! If you’re not a fan of bell peppers, you can use finely chopped zucchini or mushrooms for a different texture and flavor. Just make sure they are chopped finely for even cooking.
How long does the Sloppy Joe Starter last once opened?
Once you’ve opened a jar, your Sloppy Joe Starter can be stored in the refrigerator for up to 2 weeks. Make sure to keep it in an airtight container!
Can I freeze Sloppy Joe Starter?
Yes, you can! Pour the cooled starter into freezer-safe bags or containers, remove as much air as possible, and freeze for up to 3 months. Just thaw in the refrigerator overnight before reheating.
How can I make this vegetarian or vegan-friendly?
To make this Sloppy Joe Starter vegetarian or vegan, simply replace the meat with lentils, shredded jackfruit, or veggie crumbles. These options absorb the flavor beautifully for a hearty meal!
Print
Sloppy Joe Starter
This Sloppy Joe Starter features a delightful blend of fresh bell peppers, onions, and spices. It’s simple to prepare and packed with flavor, making it an ideal choice for a quick dinner or comfort food craving. Perfect for canning or enjoying immediately!
- Total Time: 1 hour 20 minutes
- Yield: 4 servings 1x
Ingredients
- 3 cups finely chopped green bell pepper (about 2 large peppers)
- 3 cups finely chopped red bell pepper (about 2 large peppers)
- 2 cups diced onion (about 2 large onions)
- 4 tsp salt
- 2 tsp freshly ground black pepper
- 1 can tomato paste (6.0 oz)
- 4 cans tomato sauce (8.0 oz)
- 1 cup apple cider vinegar (5% acidity)
- 1/2 cup dijon mustard
- 1/4 cup brown sugar (firmly packed)
Instructions
- Clean jars and lids with warm, soapy water and check jars for chips or bubbles.
- Wash all produce thoroughly.
- Preheat the oven to 375°F (190°C).
- Finely chop the green and red peppers, and dice the onions.
- Line a large rimmed baking sheet with aluminum foil and coat with cooking spray.
- Spread the chopped peppers and onions on the baking sheet, then add salt and pepper.
- Bake for 20 minutes or until vegetables are very tender and starting to brown, stirring occasionally.
- Prepare your canner (Water Bath or Steam Canner) and warm the jars while heating the water.
- Add the vegetable mixture to an enameled Dutch oven or stainless-steel pot and stir in the tomato paste, cooking for about 5 minutes until it thickens.
- Stir in tomato sauce, apple cider vinegar, dijon mustard, and brown sugar, then bring to a boil.
- Reduce heat and simmer uncovered, stirring frequently, until thickened (about 5 minutes).
- Remove hot jars from the canner, dump excess water, and ladle hot mixture into jars, leaving 1/2 inch headspace.
- Remove air bubbles with a de-bubbler and adjust headspace as needed.
- Wipe the rim and center the lid on the jar, screwing the band to fingertip tight.
- Place the jars back into the canner and repeat until all jars are filled.
- For Water Bath Canning: Process pint jars in boiling water for 20 minutes, ensuring jars are covered by 2 inches of water. Adjust for altitude if needed.
- For Steam Canning: Follow manufacturer instructions and process pint jars for the same time as water bath canning. Allow for cooling period before removing jars from the canner.
- Carefully move jars to a wire rack to cool for 12-24 hours. Clean jars and label once cooled.
Last Step:
Please leave a rating and comment letting us know how you liked this recipe! This helps our business to thrive and continue providing free, high-quality recipes for you.Notes
Ensure all jars are clean and free from chips for proper sealing.
Adjust processing times based on altitude for canning methods.
Label jars with the recipe name and date for easier organization.
- Prep Time: 15 minutes
- Cook Time: 65 minutes
- Category: Canning
- Method: Oven
- Cuisine: American
Nutrition
- Serving Size: 1/4 cup
- Calories: 90
- Sugar: 4g
- Sodium: 400mg
- Fat: 2g
- Saturated Fat: 0g
- Unsaturated Fat: 1g
- Trans Fat: 0g
- Carbohydrates: 16g
- Fiber: 2g
- Protein: 2g
- Cholesterol: 0mg