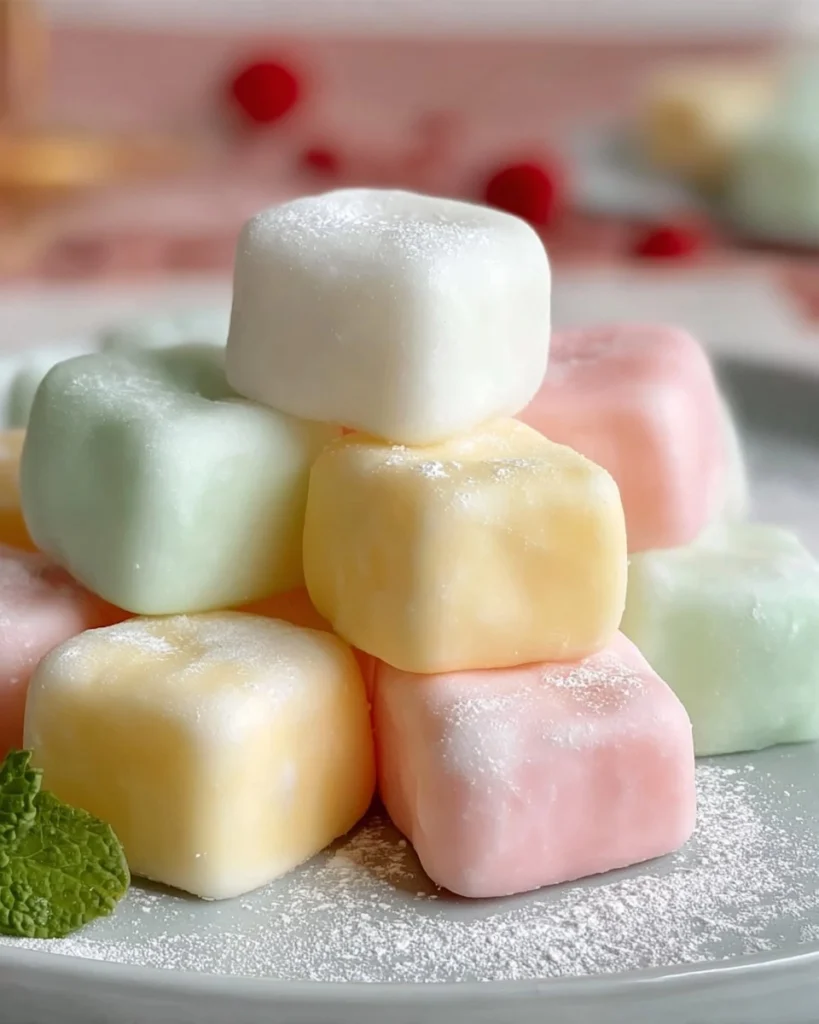
Butter Mints are a delightful treat that perfectly balance sweetness and that refreshing minty flavor we all crave. With their creamy texture and irresistible taste, these little gems are not just candies; they’re memories wrapped in sugar. I remember the first time I made them during a family gathering. My grandmother had a recipe tucked away in her collection, and I was eager to try it out. What started as a fun experiment turned into a beloved tradition, as everyone eagerly awaited these melt-in-your-mouth sweets!

These homemade Butter Mints truly shine with their simplicity and the ability to customize them with colors and flavors. Compared to store-bought versions, the homemade kind offers that special touch, a personal flavor that you just can’t find in a package. They’re an easy, no-bake candy recipe that’s perfect for any occasion—from birthday parties to holiday gatherings. Let’s dive in and create some delightful, creamy Butter Mints you and your friends will love!
Why You’ll Love This Recipe
- Simple & Quick: Ready in just 20 minutes of prep time!
- Irresistible Flavor: Creamy, buttery goodness with a refreshing peppermint kick.
- Eye-Catching Appeal: Fun to make and can be colored for various occasions!
- Flexible Serving: Perfect as a snack, party favor, or after-dinner treat.
- Diet-Friendly Options: Easy to make dairy-free with coconut cream or nut milk.
Ingredients You’ll Need
- 4 cups powdered sugar: Provides sweetness and creates a soft texture perfect for molding.
- 1/2 cup butter, softened: Adds a rich, creamy flavor that’s essential for the melt-in-your-mouth experience.
- 2–3 tablespoons heavy cream or milk: Helps bind the mixture together and gives it that delightful creaminess. You can use any milk substitute for a dairy-free version.
- 1 teaspoon peppermint extract: This is where you get that refreshing mint flavor. Use pure extract for the best quality.
- Food coloring (optional): A fun touch that can be customized to fit any celebration or your mood!
How to Make Butter Mints
- Beat the Butter: Start by beating the softened butter with an electric mixer until it becomes creamy and smooth. This will create a light base for your mints.
- Add the Powdered Sugar: Gradually add the 4 cups of powdered sugar while mixing on low speed. This helps prevent the sugar from flying everywhere!
- Incorporate Heavy Cream and Peppermint: Pour in the 2–3 tablespoons of heavy cream or milk along with the 1 teaspoon of peppermint extract. Mix well until everything is blended into a creamy consistency.
- Form the Dough: Continue adding the powdered sugar, a little at a time, until a soft dough forms. You want it to be moldable, so if it’s too sticky, sprinkle in more powdered sugar.
- Color Your Mints (Optional): Divide the dough into portions if you want to create different colors. Add food coloring and knead each portion until you achieve a uniform color throughout.
- Shape the Mints: Roll each piece of dough into ropes about 1/4 inch thick, then cut them into small, bite-sized pieces. If you prefer, you could also use a small cookie cutter for shapes!
- Dry the Mints: Place the cut mints on a lined baking tray. Allow them to dry for several hours, or overnight, until they firm up to the desired texture.
- Store the Mints: Once set, store your homemade Butter Mints in an airtight container at room temperature or in the fridge to keep them fresh.
Storing & Reheating
To keep your Butter Mints fresh, store them in an airtight container at room temperature for up to two weeks. If you’d like them to last longer, you can refrigerate them for up to a month or freeze them for up to three months. Just make sure to layer them between parchment paper to avoid sticking. When you’re ready to enjoy them, there’s no need to reheat—simply enjoy them cold and creamy as they are.
Chef’s Helpful Tips
- Avoid Overmixing: Make sure not to overmix your dough once the powdered sugar is added; it should remain light and airy.
- Butter Technique: Soften your butter properly by leaving it out at room temperature for about 30 minutes before making the recipe.
- Adjusting Flavor: If you like it mintier, feel free to add a bit more peppermint extract, but do so gradually to avoid overpowering the flavor.
- Dough Texture: If your dough feels too sticky, add more powdered sugar a tablespoon at a time until it reaches the right consistency.
- Creating Fun Shapes: Use cookie cutters or mold the mints into fun shapes for a festive touch—great for parties or gift-giving!
There’s something so satisfying about creating these nostalgic treats in your own kitchen. The creamy sweetness combined with the fresh mint makes them uniquely delightful. You can even get creative with the shapes, colors, and flavors, making them suitable for any event or season. I love to whip up a batch for holidays or to share with friends as a thoughtful gift. Don’t be surprised if they vanish before you even get a chance to enjoy them!

Recipe FAQs
Can I make these Butter Mints dairy-free?
Absolutely! You can substitute the butter with a dairy-free spread and use coconut cream or almond milk in place of heavy cream for a delicious dairy-free version.
How do I prevent the mints from sticking together?
To prevent sticking, ensure that your mints are stored in a single layer with parchment paper between them. Also, dusting them lightly with powdered sugar can help.
Can I use a different flavor instead of peppermint?
Yes, you can easily switch up the flavor! Try using peppermint oil, vanilla extract, or even other extracts like almond or orange to create delicious variations.
How long do these Butter Mints last?
When stored properly in an airtight container, they can last up to two weeks at room temperature, or significantly longer if refrigerated or frozen. Enjoy them anytime you crave a tasty minty treat!
Print
Butter Mints
These Butter Mints offer a creamy and delicious treat that’s incredibly easy to prepare! With just a handful of ingredients including powdered sugar and peppermint extract, these mints are perfect for any occasion. Enjoy their irresistible flavor and simple process that makes them a must-try for anyone looking for homemade candy.
- Total Time: 4 hours 40 minutes
- Yield: 50 servings 1x
Ingredients
- 4 cups powdered sugar
- 1/2 cup butter, softened
- 2–3 tablespoons heavy cream or milk
- 1 teaspoon peppermint extract
- food coloring (optional)
Instructions
- Beat the softened butter until it reaches a creamy consistency.
- Gradually incorporate the powdered sugar while mixing thoroughly.
- Add the heavy cream and peppermint extract, mixing well to combine.
- Continue to add more powdered sugar until the mixture forms a soft dough.
- If desired, divide the dough and mix in food coloring.
- Roll the dough into ropes and slice into small pieces.
- Arrange the mints on a lined tray and allow them to dry for several hours.
- Once set, store the mints in an airtight container.
Last Step:
Please leave a rating and comment letting us know how you liked this recipe! This helps our business to thrive and continue providing free, high-quality recipes for you.Notes
Let the mints dry completely for the best texture.
Store in a cool place to maintain firmness.
- Prep Time: 20 minutes
- Cook Time: 260 minutes
- Category: Dessert
- Method: No-bake
- Cuisine: American
Nutrition
- Serving Size: 1 mint
- Calories: 42
- Sugar: 5g
- Sodium: 1mg
- Fat: 2g
- Saturated Fat: 1g
- Unsaturated Fat: 0g
- Trans Fat: 0g
- Carbohydrates: 6g
- Fiber: 0g
- Protein: 0g
- Cholesterol: 6mg