Discovering new recipes can be a thrill, especially when they combine fun with deliciousness. Witch Hat Cookies do just that! These charming treats are perfect for Halloween gatherings, capturing the spirit of the season. Made from rich chocolate cookies with creamy frosting and crowned with classic Hershey’s Kisses, these cookies are as tasty as they are delightful to look at. Your friends and family will love their whimsical design, and they’re surprisingly easy to make.
Baking becomes even more enjoyable when you have little helpers around. Kids will love rolling the dough, decorating with frosting, and adding sprinkles! This recipe is straightforward and forgiving, making it accessible for bakers of all ages and skill levels. With these Witch Hat Cookies, there’s no need to fear the kitchen! You’ll create magical memories while treating everyone to a festive and flavorful bite. Let’s jump right into the recipe and get those ovens preheated!
Why This Recipe Works
Discover the magical blend of flavors and textures that make Witch Hat Cookies a seasonal sensation! This recipe takes classic chocolate cookies and elevates them with not only fun aesthetics but also delightful taste. The combination of rich cocoa and creamy frosting topped with iconic Hershey’s Kisses creates a playful treat perfect for any Halloween celebration.
Why You’ll Love This Witch Hat Cookies
These Witch Hat Cookies are a charming addition to your holiday festivities. They are not just delicious; they spark joy and creativity with their whimsical design. The user-friendly process makes baking a breeze, allowing even novice bakers to impress family and friends. Plus, kids will love helping out with the decorating!

Ingredients
To create these delightful cookies, gather the following ingredients:
– 2 cups all-purpose flour
– 2 tablespoons cornstarch
– ½ teaspoon salt
– ¾ cup cocoa powder
– 1 cup granulated sugar
– 1 cup unsalted butter, softened
– 1 large egg
– 2 teaspoons vanilla extract
– 8 tablespoons butter, softened (for frosting)
– 2 cups confectioners’ sugar
– 1½ tablespoons heavy cream
– ½ teaspoon vanilla extract (for frosting)
– Gel food coloring (orange)
– 60 Hershey’s Kisses
– Halloween sprinkles
Whisk Dry Ingredients Together

In a mixing bowl, whisk together 2 cups flour, 2 tablespoons cornstarch, ¾ cup cocoa powder, and ½ teaspoon salt until well combined. This dry mix creates the foundation of your delicious cookies. By ensuring these dry ingredients are mixed thoroughly, you set the stage for the perfect cookie texture.
Cream Butter and Sugar
Using an electric mixer, combine 1 cup softened butter and 1 cup granulated sugar. Mix until the mixture is light and fluffy. When you reach that airy consistency, add in 1 large egg and 2 teaspoons vanilla extract. Keep mixing until you achieve a smooth blend.
Combine Mixtures
Gradually add the dry flour mixture to the butter-sugar mixture, mixing thoroughly after each addition. This gradual approach ensures a smooth and cohesive dough. You want all the ingredients to marry well, creating a rich batter that tastes amazing!
Roll and Chill the Dough
Once you’ve combined the ingredients, shape the dough into a log approximately 1½ inches wide in diameter. Wrap it with parchment or wax paper. Refrigerate for 1 hour. Chilling is key for obtaining the perfect cookie texture; it prevents spreading during baking and helps maintain that lovely shape.
Preheat and Slice the Dough
When your hour is almost up, preheat your oven to 350°F (175°C). Carefully slice the chilled dough into ¼ to ½ inch thick rounds. Arrange them neatly on a baking sheet, leaving enough space for some natural expansion during baking.
Bake the Cookies
Bake the cookies for about 8-12 minutes, watching closely for them to be set but not overdone. Once the baking is complete, allow them to cool on the baking sheet for about 2-3 minutes before transferring to a cooling rack to cool completely. This helps them hold their shape while they cool down — imperative for a sturdy Witch Hat!
Make the Frosting
While the cookies cool, let’s whip up the frosting! In a separate mixing bowl, cream the 8 tablespoons of softened butter until it becomes light and fluffy. Gradually add 2 cups confectioners’ sugar, followed by 1½ tablespoons heavy cream, ½ teaspoon vanilla, and orange gel food coloring until thoroughly combined. Adjust the food coloring to achieve your desired orange hue. This frosting will be the magical touch that brings your Witch Hats to life!
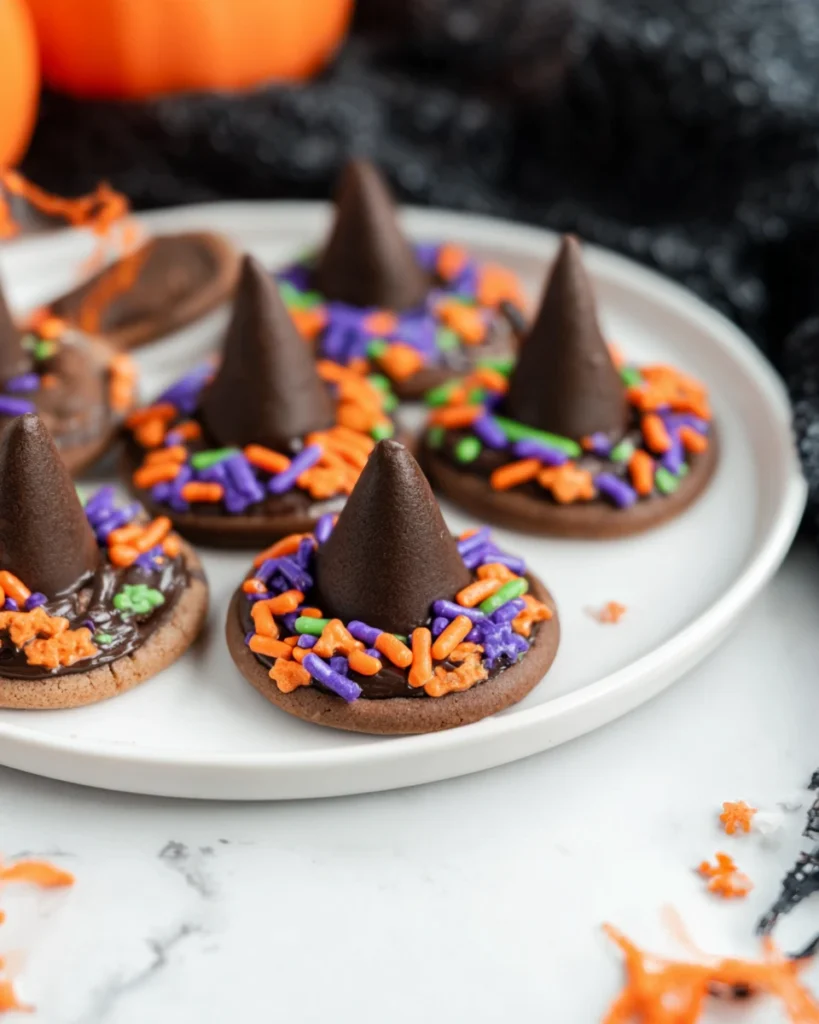
Decorate the Cookies
Now comes the fun part—decorating! Using a piping bag, pipe a small dot of frosting onto the bottom of an unwrapped Hershey’s Kiss. Place it in the center of a cooled cookie. Next, pipe frosting around the base of the Hershey’s Kiss, giving it the appearance of a witch’s hat. Finish off with a sprinkle of colorful Halloween decorations for that extra festive touch.
Store Carefully
To keep your Witch Hat Cookies fresh and delightful for your celebration, store them in an airtight container until you’re ready to serve. This way, they stay soft and delicious, ready to impress your guests!
Serving Suggestions
Enhance your Halloween gathering by serving Witch Hat Cookies alongside pumpkin spice lattes or crisp apple cider. These treats pair wonderfully with seasonal flavors and beverages, creating a festive atmosphere everyone will enjoy.
Tips for Success
Here are a few tips to ensure your Witch Hat Cookies turn out perfectly:
– Make sure your butter is softened to room temperature for easy mixing.
– Don’t skip the chilling step; it provides a sturdier dough.
– Use gel food coloring for vibrant and long-lasting color that adds to the festive look.
Variations
Feel free to experiment with different flavored kisses, like caramel or almond, for a unique twist on your Witch Hat Cookies. If you’re craving something a little different, swap out the vanilla extract with peppermint for a seasonal flair. Baking shouldn’t be mundane — let your creativity shine!

FAQs
1. How do I store Witch Hat Cookies?
Store them in an airtight container at room temperature for up to one week. They will remain soft and delicious.
2. Can I freeze the cookies?
Yes, you can freeze the cookies before decorating. Just wrap them tightly and freeze for up to 3 months.
3. What can I use instead of Hershey’s Kisses?
You can substitute with chocolate-covered almonds or other chocolate candies for a fun variation.
4. Can I make these cookies gluten-free?
Absolutely! Replacing all-purpose flour with a gluten-free flour blend will work well.
5. How can I make the frosting thicker?
Add more confectioner’s sugar gradually until you reach your desired thickness.
Indulging in Witch Hat Cookies not only provides a sweet treat but also fosters creativity and camaraderie during the baking process. Easy to make and undeniably festive, these cookies are sure to become a beloved Halloween tradition in your home. Enjoy the enchanting taste and the joy they bring to your celebration!
Print
Witch Hat Cookies
Witch Hat Cookies bring fun and flavor to your Halloween celebrations. With a combination of rich chocolate and creamy frosting, these cookies are easy to make and a joy to decorate with kids, making baking a delightful experience for all ages.
- Total Time: 1 hour 12 minutes
- Yield: 60 cookies 1x
Ingredients
- 2 cups all-purpose flour
- 2 tablespoons cornstarch
- ½ teaspoon salt
- ¾ cup cocoa powder
- 1 cup granulated sugar
- 1 cup unsalted butter, softened
- 1 large egg
- 2 teaspoons vanilla extract
- 8 tablespoons butter, softened (for frosting)
- 2 cups confectioners' sugar
- 1½ tablespoons heavy cream
- ½ teaspoon vanilla extract (for frosting)
- Gel food coloring (orange)
- 60 Hershey's Kisses
- Halloween sprinkles
Instructions
- Whisk together flour, cornstarch, cocoa powder, and salt in a bowl.
- Cream together butter and sugar until fluffy; add egg and vanilla, mixing well.
- Gradually add dry ingredients to wet mixture until well combined.
- Shape dough into a log, wrap it, and refrigerate for 1 hour.
- Preheat oven to 350°F and slice dough into rounds.
- Bake cookies for 8-12 minutes, then cool slightly before transferring to a rack.
- Prepare frosting by creaming butter, then adding confectioners' sugar, cream, vanilla, and food coloring.
- Decorate cookies with frosting and top with Hershey's Kisses and sprinkles.
Last Step:
Please leave a rating and comment letting us know how you liked this recipe! This helps our business to thrive and continue providing free, high-quality recipes for you.Notes
Ensure butter is softened for better mixing.
Don’t skip the chilling step for better dough consistency.
Gel food coloring adds vibrant color perfect for decoration.
- Prep Time: 1 hour
- Cook Time: 12 minutes
- Category: Dessert
- Method: Baking
- Cuisine: American
Nutrition
- Calories: 150
- Sugar: 10g
- Sodium: 50mg
- Fat: 7g
- Saturated Fat: 4g
- Unsaturated Fat: 3g
- Trans Fat: 0g
- Carbohydrates: 20g
- Fiber: 1g
- Protein: 2g
- Cholesterol: 20mg