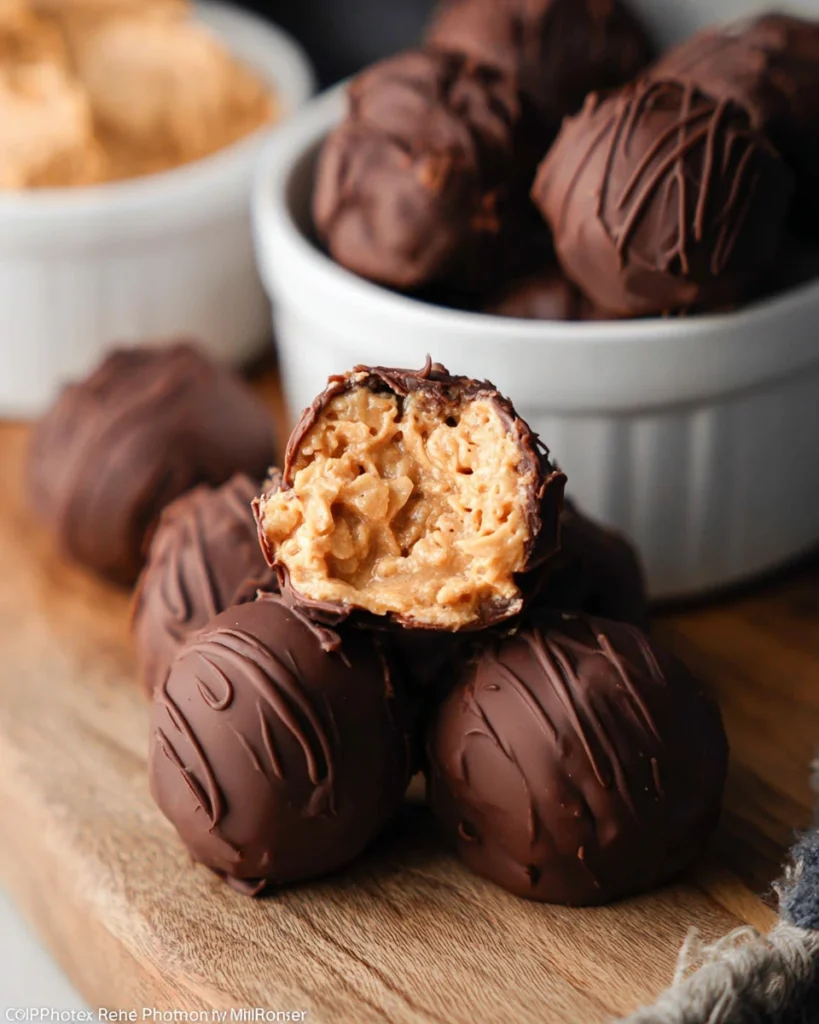
Creating Peanut Butter Balls with Rice Krispies is as enjoyable as it is delicious. Picture this: a perfect blend of creamy, rich peanut butter and the satisfying crunch of Rice Krispies. It’s a combination that captures the hearts (and taste buds) of everyone who tries it. Whether it’s for a festive gathering, a children’s party, or simply a cozy night in, these delightful bites offer a nostalgic taste of everyone’s favorite childhood snacks. You get the sweetness from the peanut butter and powdered sugar, paired nicely with the slight crispness of the cereal. Yet, the best part is how simple they are to make. Just a handful of ingredients, a quick mixing process, and a little chill time, and you have a treat that’s sure to impress—both in flavor and presentation.
Why This Recipe Works
Creating Peanut Butter Balls with Rice Krispies is a straightforward endeavor that combines simple ingredients into a delightful treat. The balance of creamy peanut butter and the crisp texture of Rice Krispies provides an irresistible contrast, making these bites a favorite for all ages. Each ingredient plays a critical role in the flavor, texture, and structure of the final product. The creamy peanut butter binds everything together while giving off that mouthwatering aroma. Plus, the Rice Krispies? They bring that satisfying crunch that takes the entire experience to the next level. Trust me; you’ll find it hard to eat just one!
Why You’ll Love This Peanut Butter Balls with Rice Krispies
This treat is perfect for any occasion! Whether you’re hosting a party, celebrating a holiday, or simply need a satisfying snack, Peanut Butter Balls with Rice Krispies are always a hit. They’re quick to prepare and even quicker to disappear, making them a treasure for both seasoned bakers and novices alike. Plus, there’s something about that combination of flavors that gives a comforting nostalgia while still being a unique and fun treat. Everyone will love the crispy texture, and the best part? You get to share this joy with friends and family.

Ingredients
- 1 cup creamy peanut butter
- ¼ cup butter, softened
- 1 cup powdered sugar
- 2 cups Rice Krispies cereal, slightly crushed
- 2 cups semi-sweet chocolate chips
- 2 tablespoons vegetable shortening
Mixing the Base

Cream Together Peanut Butter and Butter
In a large mixing bowl, combine the creamy peanut butter and softened butter. Use an electric mixer or a sturdy spatula to cream them together until well-blended and smooth. You should aim for a nice, silky texture without lumps.
Incorporate Powdered Sugar
Gradually add the powdered sugar to the peanut butter mixture. Just a bit at a time will help prevent a cloud of sugar from flying everywhere! Mix until the sugar is fully incorporated, creating a thick, sweet paste. It should feel firm yet manageable and will smell amazing.
Fold in Rice Krispies
Gently stir in the Rice Krispies until the mixture is evenly coated. You’ll want to be gentle here to maintain that wonderful crunchiness; the cereal provides a delightful texture to your peanut butter balls. Just fold until you see the cereal well-mixed with no dry spots.
Shaping the Peanut Butter Balls
Form into Bite-Sized Balls
With clean hands, take small portions of the mixture and roll them into bite-sized balls, about 1 inch in diameter. This part is fun! Feel free to get the kids involved. Just be sure to place the formed balls on a baking sheet lined with parchment paper to avoid sticking.
Chill in the Refrigerator
Refrigerate the balls for at least 30 minutes. This isn’t just for show; chilling helps them firm up and hold their shape better when you dip them in chocolate. The wait is worth it, I promise!
Melting the Chocolate
Prepare the Chocolate Coating
In a medium microwave-safe bowl, combine the semi-sweet chocolate chips and vegetable shortening. Heat in the microwave for 1 minute, then stir. Continue heating in 20-second intervals until the chocolate is completely melted and smooth. The shortening helps create a nice, glossy finish that’s just irresistible.
Dipping and Setting
Dip the Peanut Butter Balls
Remove the chilled peanut butter balls from the refrigerator. Using a fork or toothpick, dip each ball into the melted chocolate, ensuring they are fully coated. This is where your treat transforms into something special!
Place Back on Baking Sheet
Carefully return the dipped peanut butter balls to the lined baking sheet. Take your time with this step so you don’t make a mess. Repeat until all balls are coated in chocolate—feel free to have a taste of leftover chocolate for yourself!
Chill Until Firm
Refrigerate the coated peanut butter balls until the chocolate is firm, usually around 15-20 minutes. You’ll notice how fun it is to watch them set, becoming the perfect treat you’ve created.
Serving Suggestions
These Peanut Butter Balls with Rice Krispies are perfect for serving as a sweet treat at parties, family gatherings, or as an after-school snack. Try presenting them in festive cupcake liners for a decorative touch! They not only taste great but look fabulous as well.
Tips for Success
- Ensure your butter is softened for easier mixing. Cold butter just won’t work.
- Don’t skip the chilling step; it helps maintain the shape, leading to a better presentation.
- Use high-quality chocolate for a richer taste; it makes a big difference in flavor.
Variations
Feel free to customize the recipe! Substitute almond butter for peanut butter or try adding mini marshmallows for an added layer of texture. You can also roll the finished balls in crushed nuts or coconut for a unique twist. Get creative; it’s part of the fun!
Storage Tips
Store your Peanut Butter Balls in an airtight container in the refrigerator for up to a week. If you need to keep them longer, they can be frozen for up to 3 months. Just remember to thaw them in the fridge before enjoying.
Pairing Ideas
Pair these delightful treats with a glass of cold milk or a warm cup of coffee for a perfect balance of flavors. They also make a wonderful addition to a dessert platter alongside brownies and cookies.

FAQs
1. Can I use crunchy peanut butter instead of creamy?
Yes, using crunchy peanut butter will add extra texture to your balls. It’s a fun twist!
2. How long can I store these Peanut Butter Balls?
They can be stored in an airtight container in the fridge for up to a week.
3. Can I freeze Peanut Butter Balls?
Absolutely! Freeze them in an airtight container for up to 3 months.
4. What can I substitute for rice krispies?
You can use any crispy cereal, such as Corn Flakes or Chex cereal, for a different style.
5. Do I need to use vegetable shortening in the chocolate?
While not necessary, adding shortening helps to make the chocolate smoother and easier to dip.
Peanut Butter Balls with Rice Krispies offer a delightful blend of flavors and textures that appeal to a wide range of palates. Their simplicity and versatility make them a go-to recipe for any occasion, whether you’re looking for a quick snack or a crowd-pleasing dessert. With this guide, you’ll find the process easy and enjoyable, leading to a rewarding treat that anyone will love. Your kitchen will soon be filled with the joy and aroma of these delectable bites!
Print
Peanut Butter Balls with Rice Krispies
Peanut Butter Balls with Rice Krispies are a nostalgic treat combining creamy peanut butter with a satisfying crunch. Perfect for any occasion, they’re simple to make and delicious to enjoy.
- Total Time: 30 minutes
- Yield: 24 balls 1x
Ingredients
- 1 cup creamy peanut butter
- ¼ cup butter, softened
- 1 cup powdered sugar
- 2 cups Rice Krispies cereal, slightly crushed
- 2 cups semi-sweet chocolate chips
- 2 tablespoons vegetable shortening
Instructions
- Cream together peanut butter and butter in a bowl until smooth.
- Gradually add powdered sugar and mix until fully incorporated.
- Fold in Rice Krispies gently until combined.
- Form into bite-sized balls and chill in the refrigerator for 30 minutes.
- Melt chocolate chips with vegetable shortening in the microwave.
- Dip each ball in melted chocolate and place on a baking sheet.
- Chill again until chocolate sets.
Last Step:
Please leave a rating and comment letting us know how you liked this recipe! This helps our business to thrive and continue providing free, high-quality recipes for you.Notes
Use softened butter for better mixing.
Do not skip chilling for better shape and presentation.
High-quality chocolate enhances the overall flavor.
- Prep Time: 20 minutes
- Cook Time: 10 minutes
- Category: Dessert
- Method: No-Bake
- Cuisine: American
Nutrition
- Calories: 150
- Sugar: 10g
- Sodium: 75mg
- Fat: 8g
- Saturated Fat: 3g
- Unsaturated Fat: 5g
- Trans Fat: 0g
- Carbohydrates: 18g
- Fiber: 1g
- Protein: 3g
- Cholesterol: 10mg