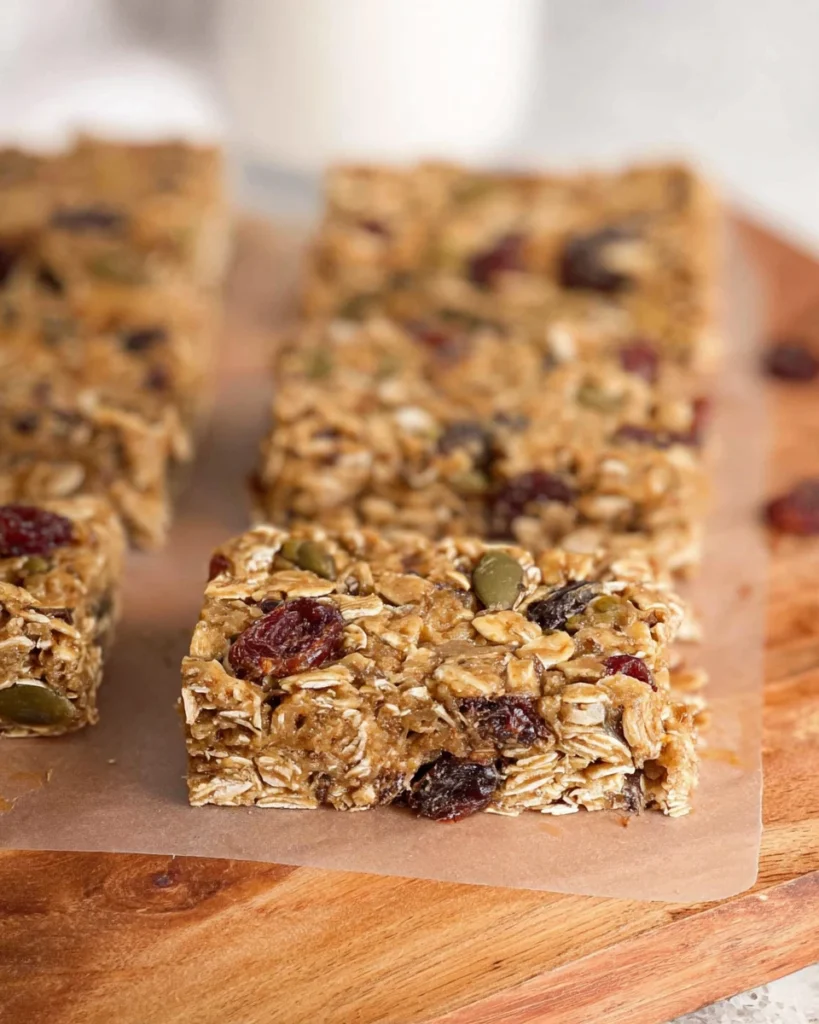
No-bake power bars are like little bundles of joy for your taste buds and your energy levels! If you’re someone who’s always on the go, these treats will quickly become your favorite go-to snack. Just imagine having a delicious, satisfying bar ready for those busy mornings or when that afternoon slump hits. The best part? You don’t have to spend hours in the kitchen. With just a few simple ingredients and a little mixing, you’ll have a batch of these wholesome bars ready to enjoy. They’re perfect for the kids, too! Let’s get into this fun recipe together!
Why This Recipe Works
No-bake power bars are an incredible solution for busy lifestyles, combining high-energy ingredients that are both nutritious and delicious. The balance of healthy fats, protein, and natural sugars makes this recipe ideal for a pre-workout boost or a mid-afternoon snack.
Why You’ll Love This No-Bake Power Bars
These No-Bake Power Bars are not only quick to prepare, but they also cater to a variety of dietary preferences. With a delightful combination of crunch, chewiness, and a touch of sweetness, you’ll find them irresistible. Perfect for on-the-go lifestyles, these bars are a family-friendly treat everyone can enjoy!

Ingredients for No-Bake Power Bars
- 1/3 cup natural peanut butter
- 1/4 cup honey
- 1 teaspoon vanilla extract
- 1 cup old-fashioned rolled oats
- 1/2 cup sliced almonds
- 1/2 cup dried cranberries
- 1/4 cup sweetened shredded coconut
- 1/4 cup pumpkin seeds
- 1/4 cup sunflower seeds
- 3 tablespoons ground flaxseed meal
- 2 tablespoons chia seeds
Preparing Your No-Bake Power Bars

Line Your Pan
Begin by lining an 8×8-inch baking pan with parchment paper. This will help ensure your power bars don’t stick and make for easy removal.
Mix Wet Ingredients Together
In a spacious bowl, stir together the natural peanut butter, honey, and vanilla extract until smooth. This mixture creates a delicious base for your bars.
Combine Dry Ingredients
Next, add in the rolled oats, sliced almonds, shredded coconut, dried cranberries, pumpkin seeds, sunflower seeds, ground flaxseed meal, and chia seeds. Stir thoroughly until all ingredients are nicely combined.
Press Mixture into Pan
Transfer the mixture into your prepared baking pan. Using your hands or a spatula, firmly press the mixture down to create an even layer.
Chill in the Refrigerator
Cover the pan and place it in the refrigerator to chill for at least 1 hour. This will help your bars set and firm up.
Slice and Store
After chilling, remove the pan from the refrigerator and carefully lift out the bars using the parchment paper. Cut into your desired sizes and enjoy! Any leftover bars can be stored in an airtight container in the refrigerator, with parchment paper layers between each for easy access.
Serving Suggestions
Enjoy your No-Bake Power Bars as a quick breakfast paired with a smoothie, or as a midday snack alongside fresh fruit or yogurt. They’re also a fantastic addition to lunch boxes for kids and adults alike!
Tips for Success
- Ensure your mixing bowl is large enough to accommodate all ingredients.
- Press the mixture firmly into the pan to prevent crumbling when cut.
- Chill longer if your bars aren’t holding together firmly after the initial hour.
Variations
- Swap out peanut butter for almond butter for a nut-free alternative, using sunflower seed butter.
- Replace dried cranberries with raisins or chocolate chips for a different flavor.
- Add spices such as cinnamon or a pinch of sea salt for an extra flavor boost.
Pairing Ideas
Pair your No-Bake Power Bars with a hot cup of tea or a refreshing iced coffee for a satisfying snack break. They also make a great accompaniment to hiking trips or picnics!

FAQs
1. How long do No-Bake Power Bars last?
They can be stored in the refrigerator for up to one week.
2. Can I freeze the power bars?
Yes, these bars can be frozen for up to three months. Just ensure they’re well-wrapped!
3. Are No-Bake Power Bars gluten-free?
To make them gluten-free, use gluten-free oats and ensure all other ingredients are gluten-free certified.
4. Can I substitute honey?
You can use maple syrup or agave nectar as a vegan alternative to honey.
5. What makes these bars ‘power’ bars?
They are packed with nutritious ingredients like nuts, seeds, and oats, providing energy and essential nutrients for a busy day.
These No-Bake Power Bars are a versatile snack option that thrive in busy schedules. Easy to prepare and customize to suit your taste, they provide a wholesome, satisfying treat perfect for any time of day. Enjoy the flavors, the ease, and the energy boost that comes with each bite!
Print
No-Bake Power Bars
These No-Bake Power Bars are a delicious and convenient snack, combining healthy fats, protein, and natural sugars. They’re perfect for busy lifestyles and taste great!
- Total Time: 0 hours
- Yield: 12 bars 1x
Ingredients
- 1/3 cup natural peanut butter
- 1/4 cup honey
- 1 teaspoon vanilla extract
- 1 cup old-fashioned rolled oats
- 1/2 cup sliced almonds
- 1/2 cup dried cranberries
- 1/4 cup sweetened shredded coconut
- 1/4 cup pumpkin seeds
- 1/4 cup sunflower seeds
- 3 tablespoons ground flaxseed meal
- 2 tablespoons chia seeds
Instructions
- Line an 8×8-inch baking pan with parchment paper.
- In a bowl, mix peanut butter, honey, and vanilla until smooth.
- Add rolled oats, sliced almonds, shredded coconut, cranberries, pumpkin seeds, sunflower seeds, flaxseed meal, and chia seeds. Stir to combine.
- Press the mixture into the prepared baking pan.
- Cover and chill in the refrigerator for at least 1 hour.
- Slice and store in an airtight container with parchment paper between bars.
Last Step:
Please leave a rating and comment letting us know how you liked this recipe! This helps our business to thrive and continue providing free, high-quality recipes for you.Notes
Ensure mixing bowl is large enough.
Press mixture firmly to avoid crumbling.
Chill longer if bars are not holding together.
- Prep Time: 15 minutes
- Cook Time: 1 hour chilling
- Category: Snack
- Method: No-bake
- Cuisine: American
Nutrition
- Calories: 150
- Sugar: 8
- Sodium: 60
- Fat: 7
- Saturated Fat: 1
- Unsaturated Fat: 5
- Trans Fat: 0
- Carbohydrates: 20
- Fiber: 3
- Protein: 4
- Cholesterol: 0