Creating a homemade apple pie filling is truly one of life’s simple pleasures. As the smell of warm apples and spices fills your kitchen, it’s hard not to feel cozy and nostalgic. There’s something special about making your own filling, allowing you to tailor the flavors to your liking. Whether you prefer it a little sweeter or with a hint of spice, this recipe lets you control it all. Plus, using fresh apples, fragrant spices, and your choice of sweetener elevates any dish, from classic apple pies to delightful pancakes. If you’re ready to take your cooking to the next level, this homemade apple pie filling is the perfect start. So, let’s get cooking!
Why This Recipe Works
Creating homemade apple pie filling allows for control over flavors and sweetness, making it a versatile base for various desserts. Using fresh apples, combined with just the right spices and sweetness, transforms your filling into something amazing. This method means you can make it your own, adjusting it based on whether you’re baking a pie, topping pancakes, or filling muffins. The magic happens when the apples cook down, releasing their juices, lending richness to any recipe. This filling not only radiates vibrant flavor but also infuses your dishes with that beloved autumn comfort.
Why You’ll Love This Homemade Apple Pie Filling
This homemade apple pie filling will take you straight to fall, evoking memories of family gatherings and cozy afternoons. It’s easy to whip up and bursting with flavors that speak to both nostalgia and comfort. Imagine serving a homemade pie, its crust golden and flaky, filled to the brim with sweet apple goodness. Or picture dolloping this filling over pancakes on a Sunday morning—it adds a delightful touch to any meal. Whether you’re an experienced baker or just starting out, this recipe is a delightful addition to your kitchen toolkit. You’ll impress your friends and family every time you use it!

Ingredients
- 5 cups sliced apples (preferably Granny Smith or Honeycrisp)
- 1 tablespoon lemon juice
- 3 cups water
- 1/2 cup granulated sugar
- 1/2 cup brown sugar
- 1/3 cup cornstarch
- 2-3 teaspoons apple pie spice
- 2 tablespoons salted butter
Preparing the Apple Filling

Peel and Slice Apples
First things first, grab your sharp paring knife and peel those apples. Slice them into thin pieces, around 1/4 inch thick. Toss the apple slices in lemon juice as you go. This helps prevent browning and enhances their natural flavor. The brighter the apples look, the more appetizing your filling will be!
Prepare the Sauce
Next up, grab a medium saucepan. Combine the water, granulated sugar, brown sugar, cornstarch, and apple pie spice in it. Set the burner to medium-high and bring this mixture to a gentle boil, stirring frequently. Watch those bubbles form!
Thicken the Mixture
As the mixture begins boiling, keep stirring for about 2 minutes. This step is crucial; it creates a smooth, syrupy base that perfectly wraps around the apples, making your filling extra delightful.
Combine Apples with Sauce
Once thickened, reduce the heat to a gentle simmer and stir in those sliced apples. Let them cook together for about 6-8 minutes. You want the apples softened but still holding their shape—watching this mixture come together is truly rewarding!
Add Butter and Cool
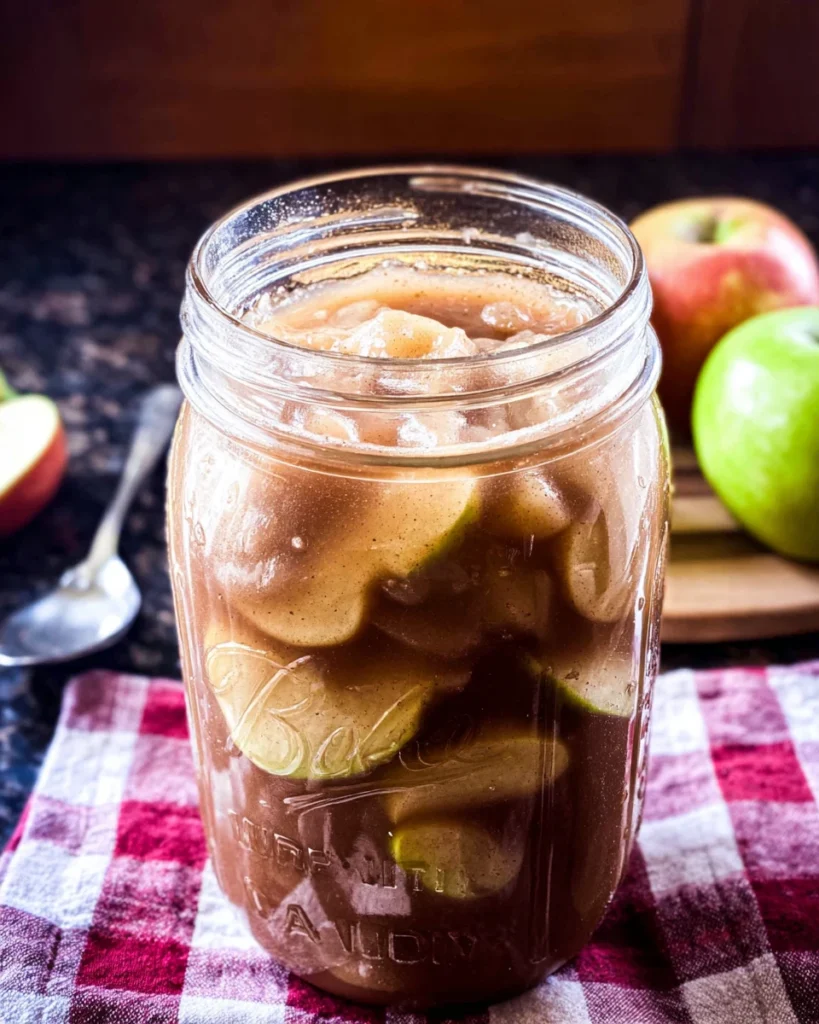
Remove your saucepan from the heat. Now, gently stir in the salted butter, allowing it to melt into the warm filling. It adds a subtle richness that enhances the flavor even more. After that, let your filling cool before transferring it to glass jars for storage. Once it’s cooled, cover and refrigerate it until you’re ready to whip up something delicious!
Serving Suggestions
Now that your homemade apple pie filling is ready, think of all the exciting ways to use it! It shines in traditional apple pies, but the fun doesn’t stop there. Consider these serving suggestions:
– Layer it in a comforting apple crisp or crumble.
– Drizzle it over pancakes or waffles for a breakfast treat.
– Create delightful parfaits by layering it with yogurt and granola.
The possibilities are endless!
Tips for Success
To ensure your apple pie filling turns out fantastic every time, keep these tips in mind:
– Select firm apples, like Granny Smith, that hold their shape during cooking.
– Adjust the sugar based on your apple variety’s sweetness.
– Allow the sauce to thicken properly; this leads to a better texture.
Variations
Feeling adventurous? You can easily tweak this homemade apple pie filling recipe to suit your taste. Try these fun variations:
– Add raisins or dried cranberries for an unexpected twist.
– Incorporate chopped nuts like pecans or walnuts for a delightful crunch.
– Experiment with different spices, perhaps cinnamon or nutmeg, to create a unique flavor profile.
Storage Tips
To keep your apple pie filling fresh, store it in airtight containers in the refrigerator for up to a week. If you wish to keep it longer, freeze portions in freezer-safe bags. This way, you’ll have delicious filling on hand for about three months, always ready for a baking session!

FAQs
1. Can I use frozen apples for this recipe?
Fresh apples yield the best texture and flavor for your filling.
2. How long can I store homemade apple pie filling?
Refrigerate it for up to one week or freeze it for about three months.
3. Can I omit the butter?
Yes, omitting it offers a lower-fat option, but it contributes richness.
4. What types of apples are best for apple pie filling?
Granny Smith, Honeycrisp, or Fuji apples balance sweetness and tartness quite well.
5. Can I double this recipe?
Absolutely! Just keep an eye on the cooking time to ensure everything thickens properly.
This homemade apple pie filling goes beyond being just a pie ingredient. It opens up a delightful realm of cozy recipes, adding warmth and sweetness to breakfast and dessert alike. Why not embrace those fall flavors all year round? With this filling in your kitchen playlist, every occasion can be turned into a sweet celebration!
Print
Homemade Apple Pie Filling
This homemade apple pie filling is bursting with warm flavors and is incredibly easy to prepare. Ideal for pies, pancakes, or any dessert craving, it brings a taste of fall to your kitchen.
- Total Time: 30 minutes
- Yield: About 6 cups 1x
Ingredients
- 5 cups sliced apples (preferably Granny Smith or Honeycrisp)
- 1 tablespoon lemon juice
- 3 cups water
- 1/2 cup granulated sugar
- 1/2 cup brown sugar
- 1/3 cup cornstarch
- 2–3 teaspoons apple pie spice
- 2 tablespoons salted butter
Instructions
- Peel and slice apples, tossing them in lemon juice.
- In a saucepan, combine water, granulated sugar, brown sugar, cornstarch, and apple pie spice.
- Bring mixture to a gentle boil, stirring frequently for about 2 minutes.
- Stir in sliced apples and simmer for 6-8 minutes until softened.
- Remove from heat, stir in butter, and allow to cool before storing.
Last Step:
Please leave a rating and comment letting us know how you liked this recipe! This helps our business to thrive and continue providing free, high-quality recipes for you.Notes
Choose firm apples like Granny Smith for the best texture.
Adjust sugar levels based on the sweetness of the apples you use.
Ensure the sauce is thickened properly for optimal consistency.
- Prep Time: 15 minutes
- Cook Time: 15 minutes
- Category: Dessert
- Method: Stovetop
- Cuisine: American
Nutrition
- Calories: 150
- Sugar: 26g
- Sodium: 5mg
- Fat: 3g
- Saturated Fat: 1g
- Unsaturated Fat: 2g
- Trans Fat: 0g
- Carbohydrates: 34g
- Fiber: 2g
- Protein: 1g
- Cholesterol: 3mg