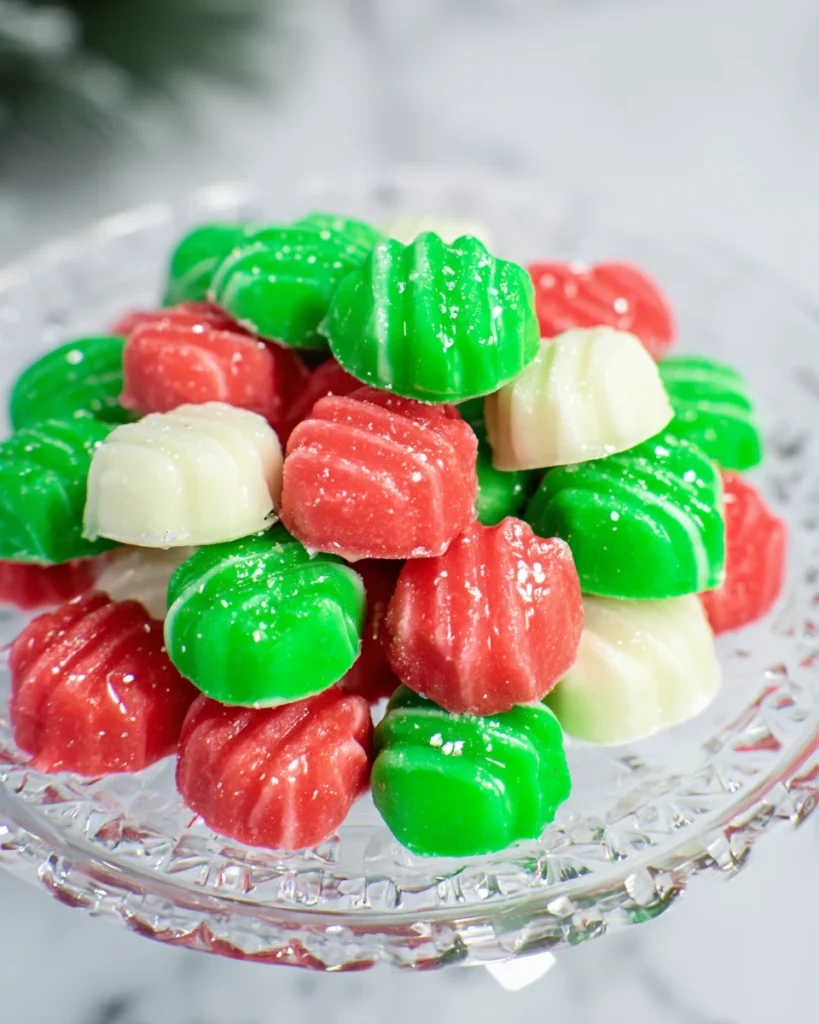
This Christmas Mint Candy recipe is the perfect addition to your holiday festivities. Imagine gathering around with friends and family, sharing delightful treats bursting with peppermint flavor. The creamy texture makes these candies simply irresistible. Plus, they’re easy to make, which is a win for everyone. Whether you’re whipping them up for a gathering, packing them into gift tins, or indulging yourself, they promise to add a cheerful festive touch. The vibrant colors will capture everyone’s attention, and the taste will transport you to cherished holiday memories. Let’s get started, so you can enjoy the sweetness of Christmas Mint Candies with your loved ones!
Why This Recipe Works
This Christmas Mint Candy recipe expertly combines the creamy richness of cream cheese and butter with the refreshing taste of peppermint. The delightful treat melts in your mouth, creating an experience that’s hard to resist. When you gradually incorporate the powdered sugar, you achieve the perfect texture. The vibrant colors add a festive appeal, making these candies not just tasty but beautiful to display during the holidays.
Why You’ll Love This Christmas Mint Candy Recipe
You’ll adore this Christmas Mint Candy recipe for its simplicity and versatility. It’s not just about making candies; it’s also about creating memories. Whether you’re preparing treats for holiday gatherings, gifting them to friends, or simply indulging yourself, these candies are sure to impress. Think of all the nostalgic flavors and cheerful colors that scream holiday cheer, making them a wonderful addition to any festive celebration.

Ingredients
To make this delightful candy, you will need:
– 8 ounces cream cheese, softened
– ¼ cup butter, softened
– 8 cups powdered sugar, separated
– ½ tsp peppermint extract
– Green gel food coloring
– Red gel food coloring
Preparing the Creamy Mixture

Mixing the Base
Start by setting up your stand mixer with the paddle attachment. Combine the softened butter and cream cheese until the mixture is smooth and creamy. This is where the magic begins! The blend of these ingredients will create a base that’s rich and delicious.
Incorporating the Sugar
Next, add 1 cup of powdered sugar to the creamy mixture. Beat on medium-low speed for about 2-3 minutes. Keep an eye on the mixture, and don’t forget to scrape down the sides of the bowl as needed. This ensures everything is well blended, giving you that perfect consistency.
Adding Peppermint Flavor
Now, it’s time for the star of the show: peppermint! Pour in the peppermint extract and gradually mix in 6 ½ cups more powdered sugar. As you do this, make sure to blend thoroughly after each addition. This step is crucial for achieving that delightful minty flavor throughout the entire mixture.
Coloring the Candy
Dividing the Mixture
Once your creamy mixture is ready, it’s time to divide it. Split the dough into three equal portions and place each in its own bowl. This is where the fun begins—let’s add some color!
Adding Color
To one bowl, add green gel food coloring; to another, add red. Knead each portion by hand until the food coloring is evenly incorporated. This part is like crafting your own holiday art. Don’t be shy—get those hands in there and mix it up!
Refrigerating the Dough
After coloring, cover each bowl with plastic wrap and pop them in the refrigerator. Let the dough firm up for about 2 hours. This helps the textured candy maintain its shape when forming the final treats.
Shaping the Candies
Preparing the Baking Sheet
While the dough is chilling, you can prepare your baking sheet. Line it with parchment paper and dust the surface with the remaining ½ cup of powdered sugar. This step will keep the candies from sticking, ensuring a clean and easy release.
Rolling Into Balls
Take a tablespoon and scoop out the chilled dough. Roll it into small balls using your palms. Place the rolled balls in a single layer on the prepared baking sheet. Make sure to leave some space between them; this will help when flattening them later on.
Flattening the Candies
Here’s a fun trick—dip the tines of a fork into powdered sugar. Then, gently press down on each dough ball to flatten it. This gives your candies a cute, classic look and helps them set better.
Allowing to Set
Once flattened, let the candies sit at room temperature for at least 4 hours. This is the magical time when they harden and form a delightful shell. You’ll notice that the exterior becomes firm, giving each candy its signature bite.
Serving Suggestions
When it’s time to serve, there are so many delightful options! You can present these Christmas Mint Candies on a festive platter, or you could package them in cute holiday tins as lovely gifts. They also make a perfect treat to enjoy alongside your favorite holiday beverages, whether it’s hot cocoa, coffee, or tea.
Tips for Success
- Make sure your cream cheese and butter are at room temperature for easier mixing.
- Take your time when adding powdered sugar; being patient helps avoid a sugary disaster!
- Store the candies in an airtight container to keep them fresh and delicious.
Variations
If you want to mix it up a bit, consider these fun variations:
– For a chocolate twist, add a bit of cocoa powder to one of the dough portions.
– Create a swirled effect by lightly kneading the colored doughs together instead of fully mixing them.
– For the health-conscious, use natural food coloring for an alternative option.
Storage Tips
Store your Christmas Mint Candies in an airtight container at room temperature for up to two weeks. If you want to keep them longer, refrigerate them for up to a month. This way, you can always have a batch ready for unexpected guests or sweet cravings!
Pairing Ideas
These festive treats pair beautifully with hot cocoa, coffee, or tea. The refreshing taste of peppermint complements the warmth of these beverages, creating an enjoyable holiday experience.

FAQs
1. Can I make these candies ahead of time?
Absolutely! You can prepare them 1-2 weeks in advance and store them in an airtight container.
2. How should I store leftover candies?
Keep them in an airtight container at room temperature or refrigerate for extra freshness.
3. Can I use different flavors instead of peppermint?
Of course! Feel free to experiment with other extracts like vanilla or almond — get creative!
4. How do I achieve brighter colors?
Add small amounts of gel food coloring gradually until you reach the desired hue.
5. Are these candies gluten-free?
Yes, all the ingredients in this recipe are gluten-free, so they’re a delight for everyone!
Enjoy sharing the joy of these festive, homemade Christmas Mint Candies. Their creamy texture, refreshing taste, and vibrant colors not only make for a visually appealing treat but also a flavorful addition to your celebrations. This holiday season, gather your loved ones, and immerse yourself in the delightful process of making and savoring these confections. Happy holidays!
Print
Christmas Mint Candy
This Christmas Mint Candy offers a creamy, delightful blend of cream cheese and peppermint. Ideal for gatherings, gifts, or a sweet indulgence.
- Total Time: 0 hours
- Yield: Approximately 40 candies 1x
Ingredients
- 8 ounces cream cheese, softened
- ¼ cup butter, softened
- 8 cups powdered sugar, separated
- ½ tsp peppermint extract
- Green gel food coloring
- Red gel food coloring
Instructions
- Beat cream cheese and butter until smooth.
- Gradually mix in powdered sugar, one cup at a time.
- Add peppermint extract and the remaining powdered sugar.
- Divide mixture into three bowls; color two portions with food coloring.
- Refrigerate for 2 hours to firm up.
- Roll dough into balls and flatten with a sugared fork.
- Let set at room temperature for at least 4 hours.
Last Step:
Please leave a rating and comment letting us know how you liked this recipe! This helps our business to thrive and continue providing free, high-quality recipes for you.Notes
Ensure cream cheese and butter are at room temperature for easy mixing.
Add powdered sugar gradually to avoid a mess.
Store candies in an airtight container to maintain freshness.
- Prep Time: 25 minutes
- Cook Time: 4 hours setting time
- Category: Dessert
- Method: No-bake
- Cuisine: American
Nutrition
- Calories: 80
- Sugar: 10g
- Sodium: 40mg
- Fat: 3g
- Saturated Fat: 2g
- Unsaturated Fat: 1g
- Trans Fat: 0g
- Carbohydrates: 12g
- Fiber: 0g
- Protein: 1g
- Cholesterol: 10mg