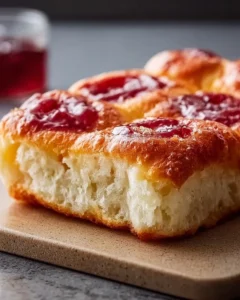
Buttermilk biscuits are the ultimate comfort food, and there’s something undeniably special about them. These fluffy, golden treats are known for their tender layers and buttery flavor that melt in your mouth. With a perfectly crispy exterior and a soft, pillowy inside, they make any meal feel like a celebration. Picture a Saturday morning filled with the aroma of freshly baked biscuits wafting through the house, making it impossible not to smile. Whether slathered with jam, dripping with honey, or simply enjoyed on their own, buttermilk biscuits are a staple that never disappoints.

I still remember the first time I made buttermilk biscuits. I was trying to impress a group of friends who dropped by unexpectedly. With just a few simple ingredients—flour, baking powder, and buttermilk—I whipped up a batch that left everyone in awe. They were devoured in mere minutes! Since then, I’ve refined my technique, and I’m excited to share it with you. Trust me, once you’ve had these homemade biscuits, you’ll never look at the store-bought versions the same way again. There’s a little magic in making them from scratch, and I can’t wait for you to experience it yourself.
Why You’ll Love This Recipe
- Simple & Quick: These biscuits come together in just 10 minutes and bake in under 20—perfect for a speedy breakfast!
- Irresistible Flavor: The combination of all-purpose and bread flour creates a delightful texture, while the buttermilk imparts a tangy richness.
- Eye-Catching Appeal: Freshly-baked biscuits not only taste heavenly but look impressive, making them a great addition to any meal.
- Flexible Serving: Enjoy them for breakfast, as a side for dinner, or even as a snack! They’re delightful any time of day.
- Diet-Friendly Options: Substitute gluten-free flour if needed, for a delicious gluten-free version.
Ingredients You’ll Need
- 1 cup all-purpose flour: This is the backbone of your biscuit, providing structure. For best results, spoon and level your flour instead of scooping to avoid packing it.
- 1 cup bread flour: Adding bread flour enhances the texture, giving it that tender chewiness. If you don’t have bread flour, you can replace it with more all-purpose flour, though it may slightly change the texture.
- 3 tablespoons baking powder: This leavening agent is crucial for achieving those tall, fluffy biscuits. Be sure it’s fresh for optimal rise.
- 1 ½ teaspoons kosher salt: Salt enhances all flavors; don’t skip it! If you use table salt, reduce the amount slightly since it’s more concentrated.
- 8 tablespoons unsalted butter (frozen): Chilling and shredding the butter creates perfectly flaky layers. For a dairy-free option, try cooling coconut oil or a vegan butter alternative.
- ¾ cup buttermilk: The key ingredient that makes these biscuits rich and tender. If you don’t have buttermilk, you can make your own by adding 1 tablespoon of lemon juice or vinegar to regular milk and letting it sit for 5-10 minutes.
- 1 tablespoon melted butter for brushing: A little melted butter brushed on top gives a gorgeous shine and extra flavor to the finished product.
How to Make Buttermilk Biscuits
- Freeze the Butter: Begin by shredding 8 tablespoons of unsalted butter and transfer it to the freezer for 30-45 minutes. This quick chill helps create those flaky layers.
- Preheat the Oven: While the butter chills, preheat your oven to 425℉. Line a baking sheet with parchment paper and set it aside. A hot oven ensures proper rising.
- Mix Dry Ingredients: In a large mixing bowl, measure 1 cup all-purpose flour, 1 cup bread flour, 3 tablespoons baking powder, and 1 ½ teaspoons kosher salt. Whisk to thoroughly combine.
- Incorporate the Butter: Add the frozen shredded butter to the dry mixture, stirring gently to coat all the butter pieces. Create a well in the center of the mixture for the buttermilk.
- Add Buttermilk: Pour in ¾ cup cold buttermilk, stirring quickly until just combined. If the dough seems too dry, you can add an extra tablespoon of buttermilk to bring it together. Be careful not to overmix; you want tender biscuits, not tough ones!
- Prepare Your Surface: Place a sheet of parchment paper on a flat surface and lightly sprinkle it with flour.
- Form the Dough: Turn the biscuit mixture onto the floured parchment paper. Gently fold the parchment over the mixture, pressing it to form a square or rectangle. Repeat this folding process from side to side, being careful not to overwork the dough.
- Layer the Dough: Use a pastry scraper to cut the dough in half and stack one half on top of the other. Fold the parchment over again and press down to create a square or rectangle. Repeat this two more times for a total of three folds.
- Cut the Biscuits: After the third fold, use a biscuit cutter or pastry scraper to cut biscuits. Avoid twisting as you cut, as this can prevent them from rising properly. Gather scraps and pat them into another rectangle to cut additional biscuits.
- Chill the Biscuits: Arrange the biscuits on the prepared baking sheet and place them in the freezer for 10-15 minutes to firm up slightly.
- Brush with Butter: While the biscuits chill, melt 1 tablespoon of butter to brush on top of them after they bake.
- Bake: Once chilled, brush the tops of the biscuits with the melted butter and transfer them to the preheated oven. Bake for 15-17 minutes, or until the tops are tall, golden brown, and fragrant.
- Serve Warm: Enjoy your freshly baked buttermilk biscuits warm, perhaps with a dollop of butter and your favorite jam, or simply on their own!
Storing & Reheating
To store leftover buttermilk biscuits, keep them at room temperature in an airtight container for up to 2 days. For longer storage, refrigerate them for up to 1 week. If you’d like to freeze the biscuits, place them in a zip-top bag or an airtight container, and they’ll last up to 3 months. To reheat, simply bake them at 350℉ for about 10 minutes until warmed through. However, keep in mind that reheating may slightly change their texture, so brushing them with a bit of melted butter before serving can help refresh them.
Chef’s Helpful Tips
- Avoid Overmixing: The key to tender biscuits is minimal mixing. Once you add the buttermilk, stir just until everything comes together.
- Chill Your Tools: Using chilled bowls and utensils can help keep your butter from warming up too much, leading to better texture.
- Watch the Oven: Every oven can vary, so start checking your biscuits a minute or two earlier than the recommended time to prevent overbaking.
- Customize Flavors: Feel free to add herbs, cheese, or spices to the dough for an extra kick of flavor.
- Make-ahead Option: You can prepare and cut the biscuits, then freeze them on the baking sheet before transferring to a bag. Bake from frozen for a quick treat whenever you want!
Buttermilk biscuits truly are a wondrous addition to any meal. They are easy, delightful, and versatile, perfect for a cozy breakfast, lazy brunch, or scrumptious dinner side. Allow yourself to experiment with the recipe, adding flavors or adjusting ingredients to suit your taste. Once you take a bite of these warm, flaky biscuits, you’ll understand why they hold a special place in so many hearts. Enjoy the process, and don’t forget to share them with someone special!

Recipe FAQs
Can I make buttermilk biscuits without baking powder?
Absolutely! You can use baking soda in combination with an acid like vinegar or lemon juice. For every cup of milk, use 1 tablespoon of vinegar or lemon juice to create a homemade buttermilk, then add 1-2 teaspoons of baking soda to your dry ingredients.
What makes my biscuits tough?
The most common reason for tough biscuits is overmixing the dough. Always mix until ingredients are just combined. Additionally, avoid using warm butter, as it can affect the final texture.
Can I prepare the biscuit dough in advance?
Yes, you can prepare the biscuit dough, cut out the biscuits, and freeze them before baking. Just place them on a baking sheet to freeze, then transfer to a zip-top bag. Bake from frozen, adding an extra 2-3 minutes to the baking time.
How do I achieve flaky layers in my biscuits?
Chilling the butter and using a minimal mixing technique creates those desirable layers. The cold butter creates steam while baking, which helps the biscuits rise and develop layers.
Print
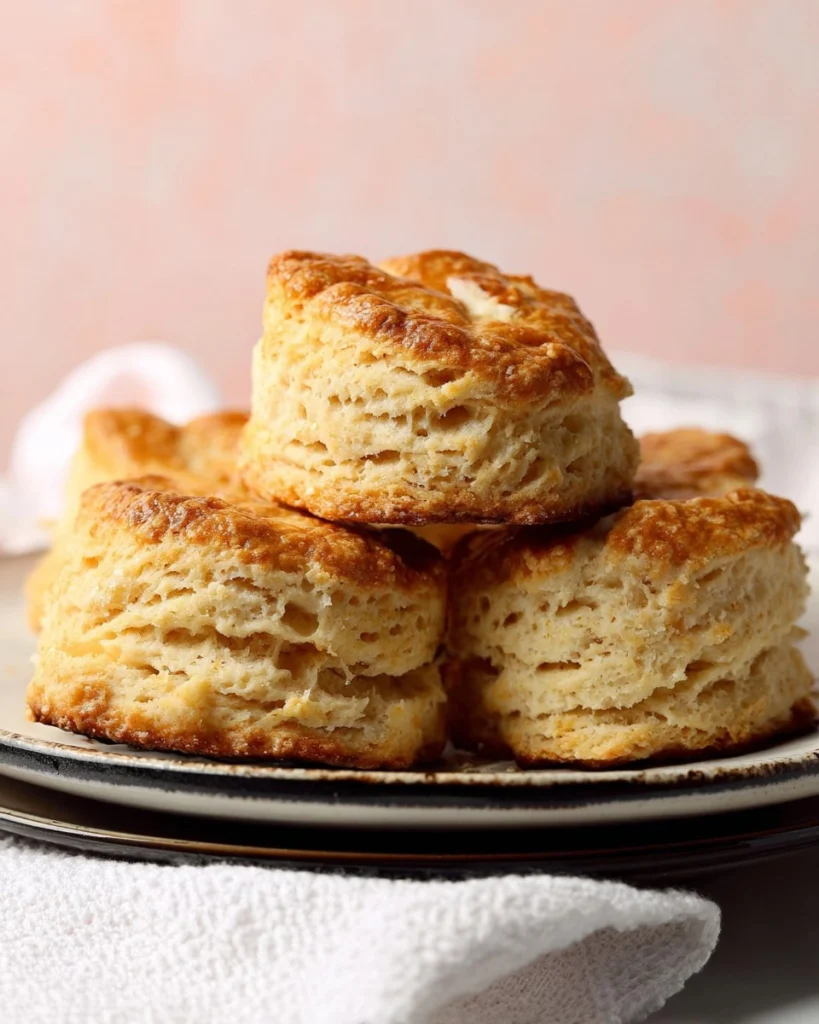
Buttermilk Biscuits
These buttermilk biscuits are exceptionally fluffy with a buttery flavor, easy to make, and ideal for any occasion. Perfect for a comforting meal!
- Total Time: 45 minutes
- Yield: 6 servings 1x
Ingredients
- 1 cup all-purpose flour
- 1 cup bread flour
- 3 tablespoons baking powder
- 1 ½ teaspoons kosher salt
- 8 tablespoons unsalted butter frozen
- ¾ cup buttermilk
- 1 tablespoon melted butter for brushing
Instructions
- Shred 8 tablespoons of unsalted butter and freeze for 30-45 minutes.
- Preheat the oven to 425℉ and line a baking sheet with parchment paper.
- In a large mixing bowl, combine 1 cup all-purpose flour, 1 cup bread flour, 3 tablespoons baking powder, and 1 ½ teaspoons kosher salt; whisk together.
- Add the frozen shredded butter to the flour mixture, coating evenly, and make a well in the center for the buttermilk.
- Pour ¾ cup cold buttermilk into the mixture and stir until just combined. If too dry, add more buttermilk a tablespoon at a time.
- Place parchment paper on a flat surface, dust lightly with flour.
- Transfer the biscuit mixture onto the parchment and gently fold the paper over to shape it into a square or rectangle. Repeat this folding action from side to side.
- Using a pastry scraper, cut the dough in half and stack it. Fold the parchment over and press down again into shape; repeat this process two more times.
- After the third folding, cut out biscuits with a biscuit cutter, avoiding twisting that could hinder rising. Gather scraps and form additional biscuits.
- Place the biscuits on the prepared sheet pan and freeze for 10-15 minutes.
- Melt 1 tablespoon of butter to brush on top before baking.
- After freezing, brush with melted butter and put them in the oven to bake.
- Bake for 15-17 minutes until tall, golden brown, and buttery.
- Serve warm with toppings of your choice and enjoy!
Last Step:
Please leave a rating and comment letting us know how you liked this recipe! This helps our business to thrive and continue providing free, high-quality recipes for you.Notes
Ensure the butter stays cold for better flaky texture.
Don’t overmix the dough to keep biscuits tender.
Leftovers can be stored in an airtight container.
- Prep Time: 10 minutes
- Cook Time: 35 minutes
- Category: Baking
- Method: Baking
- Cuisine: American
Nutrition
- Serving Size: 1 biscuit
- Calories: 180
- Sugar: 0g
- Sodium: 380mg
- Fat: 8g
- Saturated Fat: 5g
- Unsaturated Fat: 3g
- Trans Fat: 0g
- Carbohydrates: 23g
- Fiber: 1g
- Protein: 4g
- Cholesterol: 20mg