There’s something magical about cherry pie pastry envelopes. Picture this: a flaky, buttery crust cradling a luscious cherry filling, ready to be enjoyed anytime, anywhere. As you open the oven door, warm, sweet aromas envelop your kitchen, instantly transporting you to cherished moments shared with family and friends. Creating these delightful treats doesn’t just bring nostalgia; it sparks joy and connection. Whether you’re looking to impress your guests at a gathering or simply craving a cozy dessert at home, this cherry pie pastry envelope recipe offers a delightful twist on a classic. Today, we’ll explore how to create these charming, portable desserts that will not only satisfy your sweet tooth but also bring a smile to your face. Let’s channel our inner bakers and get started!
Why This Recipe Works
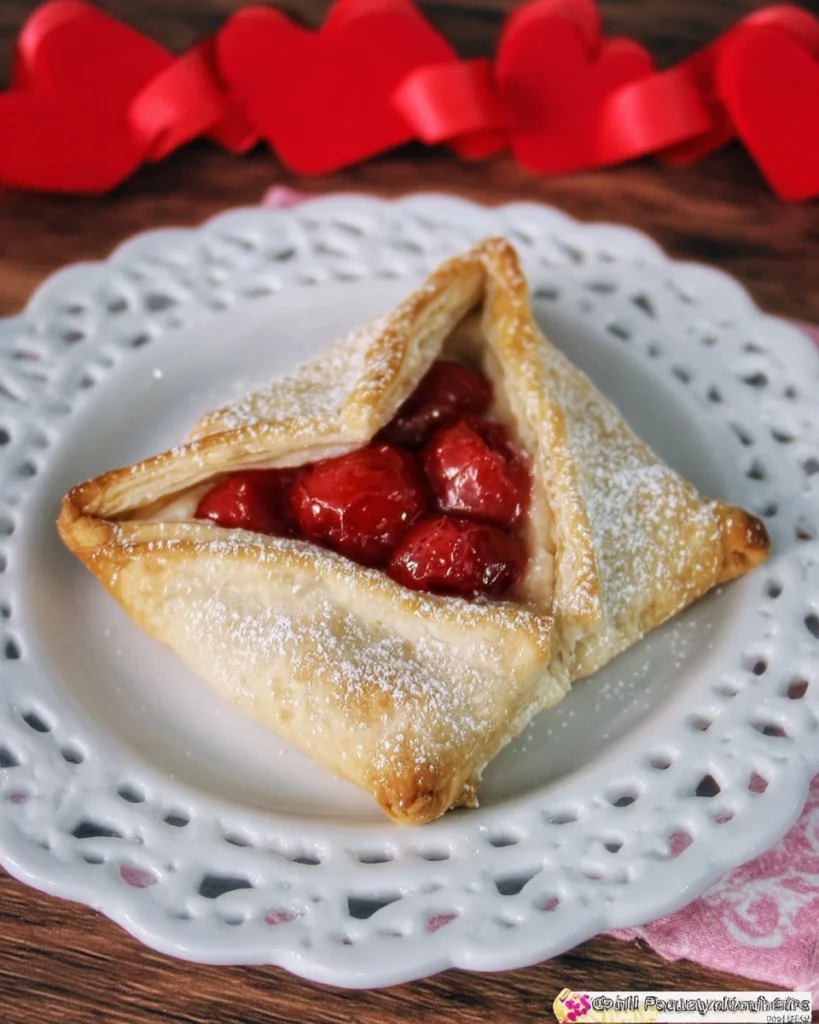
Cherry pie pastry envelopes are a delightful twist on traditional pie, providing a portable version of a classic dessert. The refrigerated pie crust saves time, while the cherry filling bursts with flavor. This recipe strikes a perfect balance between a flaky exterior and a sweet, juicy interior. Each bite offers that satisfying contrast, making them ideal for anyone who adores pie but wants a fun and easy way to enjoy it.
Why You’ll Love This Cherry Pie Pastry Envelope
There’s nothing quite like the comforting aroma of warm cherry pie wafting through your kitchen. Every time you take a bite of these envelopes, you’re not just enjoying dessert; you’re creating lasting memories with family and friends. Ideal for gatherings or a treat at home, they offer both nostalgia and a fun, interactive way to enjoy dessert. Each envelope is like a little hug of warmth, making these sweet pastries all the more delightful.

Ingredients
- 1 package refrigerated pie crust
- 1 can cherry pie filling
- 1/2 cup sparkling sugar
- 1/4 cup whipping cream
- One 4 x 5 inch paper envelope
- One small heart-shaped cookie cutter
How to Make Cherry Pie Pastry Envelope

Prepare Your Ingredients
First things first, gather all your ingredients. Preheat your oven to 375°F (190°C). Having everything ready ensures a smooth preparation process. Think of it as setting up a little station for your baking adventure!
Unroll the Pie Crust
Next, carefully unroll the refrigerated pie crust on a lightly floured surface. If needed, grab a rolling pin to smooth out the dough. This helps to make sure your envelopes are nice and uniform.
Cut Out Base for the Envelopes
Now it’s time to get creative! Using your heart-shaped cookie cutter, cut out heart shapes from the pie crust. Each envelope will require two hearts. The playful shapes will make your pastry envelopes even more fun to serve and eat!
Assemble the Cherry Filling
Spoon a generous amount of cherry pie filling onto the center of one heart-shaped pie crust. Just remember, don’t overfill! Too much filling can cause the envelope to burst, and we want them looking just as lovely as they taste.
Seal the Envelopes
Take the second heart-shaped crust and place it on top of the filled one. Gently press the edges together to seal. You can even use a fork to crimp the edges for a decorative touch, adding a bit of charm to your pastries.
Brush with Whipping Cream
Grab a pastry brush and apply whipping cream over the top of each pastry envelope. This step will help achieve a beautiful golden color once baked, making your envelopes look irresistible.
Sprinkle with Sparkling Sugar
Now for a little extra sparkle! Generously sprinkle sparkling sugar over the whipped cream-brushed envelopes. This adds sweetness and a delightful crunch to each bite, making it even more enjoyable.
Bake the Pastry Envelopes
Place the envelopes on a baking sheet lined with parchment paper. Pop them into the preheated oven and bake for 20-25 minutes or until they turn a lovely golden brown. Keep an eye on them; they can go from golden to overdone pretty quickly!
Cool and Serve
Once baked, allow the cherry pie pastry envelopes to cool for a few minutes before serving. Enjoy them warm, either plain or with a scoop of vanilla ice cream. The combination of warm pastry and cold ice cream is pure bliss!
Serving Suggestions
Cherry pie pastry envelopes shine when served warm with a scoop of vanilla ice cream. For an extra touch, consider dolloping on some freshly whipped cream or adding a drizzle of chocolate sauce. Pair them with coffee or a glass of dessert wine for an indulgent treat that will delight your taste buds.
Tips for Success
- Chill the pie crust before baking for an even flakier texture.
- Feel free to experiment with different fruit fillings, like blueberry or apple. Each option brings its own unique twist to the recipe.
- For added flavor, incorporate a pinch of cinnamon into the cherry filling to elevate the taste.
Variations
Make it your own by substituting the cherry filling with any other fruit filling of your choice. You could use raspberry or peach for a delightful change. Additionally, for a more festive touch, sprinkle some seasonal spices into the whipped cream for a surprising flavor profile.
Pairing Ideas
Cherry pie pastry envelopes pair wonderfully with fresh fruit salads, yogurt parfaits, or a classic scoop of vanilla or cherry ice cream. If you’re looking for a drink to complement the dish, a light Pinot Noir or a sweet Riesling wine fits beautifully.

FAQs
1. Can I make the pastry envelopes ahead of time?
Absolutely! You can prepare the envelopes and refrigerate them before baking for up to 24 hours. Just remember to let them come to room temperature before popping them in the oven.
2. What can I use instead of cherry pie filling?
Feel free to swap out the cherry filling for any fruit pie filling of your choice, such as blueberry, raspberry, or peach. Each option will create a delightful variation.
3. How long do the cherry pie pastry envelopes last?
While they are best enjoyed fresh, you can store them in an airtight container for up to three days. However, they probably won’t last that long!
4. Can I freeze these pastry envelopes?
Yes! You can freeze unbaked pastry envelopes. Just bake them straight from the freezer, adding a few additional minutes to the baking time.
5. How can I make these healthier?
To create a healthier version, consider using whole wheat pie crust and reducing the sugar in the cherry filling. It’s a small change that can make a big difference.
Cherry pie pastry envelopes are more than just a dessert; they evoke feelings of warmth and togetherness. With this simple recipe, you can create delightful treats that will impress your family and friends. The perfect balance of flaky crust and sweet cherry filling makes each bite a little slice of heaven. Whether enjoyed as a snack or a grand finale to a meal, this recipe is sure to bring joy to your table.
Print
Cherry Pie Pastry Envelopes
Cherry pie pastry envelopes are a fun, portable twist on a classic pie. With a flaky crust and juicy cherry filling, they’re ideal for any occasion.
- Total Time: 40 minutes
- Yield: 8 servings 1x
Ingredients
- 1 package refrigerated pie crust
- 1 can cherry pie filling
- 1/2 cup sparkling sugar
- 1/4 cup whipping cream
- One 4 x 5 inch paper envelope
- One small heart-shaped cookie cutter
Instructions
- Preheat oven to 375°F (190°C).
- Unroll pie crust on a floured surface.
- Cut out heart shapes for envelopes.
- Spoon cherry filling onto one heart-shaped crust.
- Seal with a second heart-shaped crust, pressing edges together.
- Brush with whipping cream.
- Sprinkle with sparkling sugar.
- Bake for 20-25 minutes until golden.
- Cool slightly before serving.
Last Step:
Please leave a rating and comment letting us know how you liked this recipe! This helps our business to thrive and continue providing free, high-quality recipes for you.Notes
Chill the pie crust for a flakier texture.
Try different fruit fillings for variety.
Add cinnamon to elevate the cherry flavor.
- Prep Time: 15 minutes
- Cook Time: 25 minutes
- Category: Dessert
- Method: Baking
- Cuisine: American
Nutrition
- Calories: 220
- Sugar: 10
- Sodium: 150
- Fat: 9
- Saturated Fat: 2
- Unsaturated Fat: 7
- Trans Fat: 0
- Carbohydrates: 31
- Fiber: 1
- Protein: 2
- Cholesterol: 5