This holiday season, treat yourself to something truly extraordinary: a Pink Peppermint Christmas Ice Cream Cake. Imagine combining the flavors of peppermint with rich chocolate, all layered beautifully into a cake that’s as festive as it is delicious. Whether you’re gathering with family or hosting friends, this cake is sure to bring smiles all around. The bright pink hues remind us of holiday cheer, and the crunch of crushed candy canes adds that perfect festive touch. Plus, it’s easy to make, allowing you to spend less time in the kitchen and more time enjoying the holiday spirit. So, let’s get started on this fun and delicious journey of creating a delightful Pink Peppermint Christmas Ice Cream Cake!
Why This Recipe Works
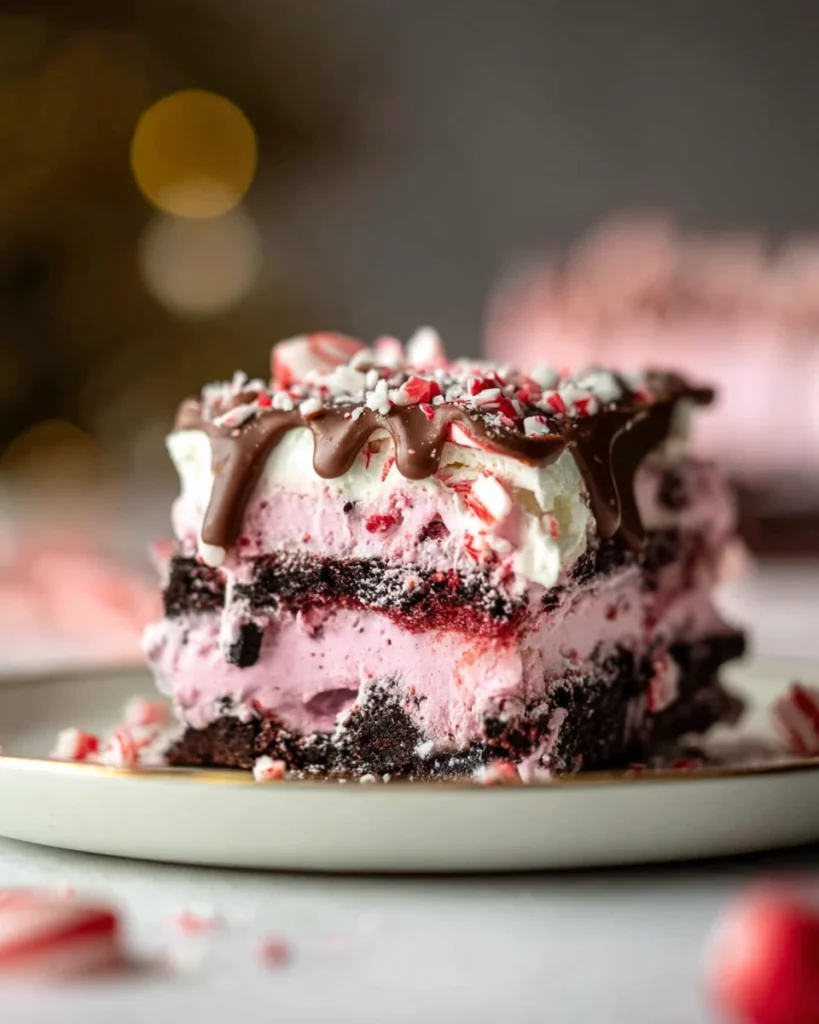
This Pink Peppermint Christmas Ice Cream Cake is a festive treat that combines the nostalgic flavors of the holiday season with the coolness of ice cream. The interplay of rich chocolate cookies, refreshing peppermint ice cream, and a delicate drizzle of melted chocolate creates a multi-dimensional dessert that’s both visually appealing and deliciously satisfying.
Why You’ll Love This Pink Peppermint Christmas Ice Cream Cake
Perfect for holiday gatherings, this ice cream cake brings joy to the table with its delightful pink hues and crunchy toppings. It’s easy to prepare, requires minimal fuss, and is a guaranteed crowd-pleaser—making it an ideal choice for any Christmas celebration.

Ingredients
- 1 (14 oz) package chocolate sandwich cookies (like Oreos)
- 2 (½ gallon) cartons peppermint ice cream (or 6 to 8 pints)
- 12 classic rectangular ice cream sandwiches
- 6 ounces milk or dark chocolate (your choice)
- 1 tablespoon coconut oil
- Crushed candy canes (for topping)
Creating the Cookie Crust

Prepare Your Pan
Start by lining a 9×13 inch dish or pan with two layers of plastic wrap, allowing the wrap to drape over the edges. This will help you lift the finished cake out easily.
Get the Ice Cream Ready
Let the peppermint ice cream sit out at room temperature for about 10-15 minutes until it’s soft enough to spread but not entirely melted.
Crush the Cookies
Coarsely crush the chocolate sandwich cookies. You can place them in a resealable bag and crush with your hands or a rolling pin, or pulse them in a food processor until you achieve larger chunks—avoid making them into fine crumbs.
Form the Crust
Evenly spread the crushed cookies across the bottom of your prepared pan, forming a solid crust. This step is key; it gives the cake a nice texture and taste, grounding the layers above it.
Layering the Ice Cream
Add the First Ice Cream Layer
Spoon the first carton of softened peppermint ice cream over the cookie crust, spreading it carefully to avoid disturbing too many of the cookies beneath. This layer adds a refreshing minty flavor that harmonizes perfectly with the chocolate crust.
Place the Ice Cream Sandwiches
Return the pan to the freezer for a few minutes while you unwrap the ice cream sandwiches. Layer them on top of the ice cream. If needed, cut the last two sandwiches in half to ensure they cover the layer evenly, filling every nook and cranny.
Top with the Second Ice Cream Layer
Spread the second carton of peppermint ice cream over the ice cream sandwiches. You can use as much as desired or as space allows. After this, cover the pan tightly with plastic wrap and freeze it for at least 2 hours, or preferably overnight for the best texture.
Finishing Touches
Melt the Chocolate
About 20 minutes before serving, melt the chocolate and coconut oil together in a microwave-safe bowl. Heat in 30-second increments, stirring until smooth. This will create a rich, glossy drizzle for your dessert that’s sure to impress.
Assemble and Serve
When ready, remove the ice cream cake from the freezer. Gently pull it out of the pan using the plastic wrap. Drizzle the melted chocolate over the top, and sprinkle generously with crushed candy canes. Slice and serve your delightful creation!
Serving Suggestions
Pair your Pink Peppermint Christmas Ice Cream Cake with hot cocoa or coffee for a cozy dessert experience. You could also complement it with holiday cookies or festive pastries, adding to the joy of the season. Watching this cake disappear at a party is almost as enjoyable as making it.
Tips for Success
- Ensure that the ice cream is not too soft or too hard while layering for the best texture.
- Use fresh candy canes for a vibrant look and crunch, lending additional holiday flair.
- Allow the cake to sit at room temperature for a few minutes prior to slicing for easier serving. This makes cutting through the layers much simpler.
Variations
Consider substituting different ice cream flavors, such as vanilla or chocolate, for a unique twist. You can also add layers of fudge or caramel sauce for extra indulgence. Mixing in some festive sprinkles can kick it up a notch too!
Storage Tips
Store any leftover cake in the freezer wrapped tightly in plastic wrap or in an airtight container for up to a week. Enjoy it frozen or let it thaw slightly before serving. No matter how you enjoy it, each bite is a reminder of the joyous season.

FAQs
1. Can I make this cake ahead of time?
Yes! This cake can be made a few days in advance, allowing the flavors to meld beautifully.
2. What if I can’t find peppermint ice cream?
You can substitute peppermint with vanilla or chocolate ice cream; add peppermint extract for a minty kick!
3. How do I keep leftovers fresh?
Wrap the cake tightly in plastic wrap and keep it in the freezer for optimal freshness.
4. Can I use different cookies for the crust?
Absolutely! Any chocolate cookies will work well, such as mint thins or chocolate wafers.
5. How many servings does this cake make?
This recipe yields approximately 12-16 servings, depending on portion size.
Enjoy this delightful Pink Peppermint Christmas Ice Cream Cake at your next holiday celebration. Its layers of flavor and festive presentation are sure to impress your guests and create lasting memories. With simple steps and accessible ingredients, this treat embodies the spirit of Christmas—a celebration of joy, togetherness, and delicious desserts.
Print
Pink Peppermint Christmas Ice Cream Cake
This Pink Peppermint Christmas Ice Cream Cake combines refreshing peppermint ice cream with crunchy chocolate cookies for a festive dessert that brings joy to any holiday gathering.
- Total Time: 0 hours
- Yield: 12-16 servings 1x
Ingredients
- 1 (14 oz) package chocolate sandwich cookies (like Oreos)
- 2 (½ gallon) cartons peppermint ice cream (or 6 to 8 pints)
- 12 classic rectangular ice cream sandwiches
- 6 ounces milk or dark chocolate (your choice)
- 1 tablespoon coconut oil
- Crushed candy canes (for topping)
Instructions
- Line a 9×13 inch dish with plastic wrap.
- Let the peppermint ice cream soften.
- Crush the chocolate sandwich cookies coarsely.
- Spread the crushed cookies across the bottom of the pan.
- Add the first layer of peppermint ice cream over the crust.
- Layer ice cream sandwiches on top of the ice cream.
- Spread the second layer of peppermint ice cream and freeze.
- Melt chocolate and coconut oil together.
- Drizzle melted chocolate over the frozen cake and top with crushed candy canes.
- Slice and serve.
Last Step:
Please leave a rating and comment letting us know how you liked this recipe! This helps our business to thrive and continue providing free, high-quality recipes for you.Notes
Ensure the ice cream is at the right softness for easy layering.
Use fresh candy canes for the best flavor and presentation.
Let the cake sit at room temperature briefly before slicing for easier serving.
- Prep Time: 30 minutes
- Cook Time: None
- Category: Dessert
- Method: Layering and freezing
- Cuisine: American
Nutrition
- Calories: 350
- Sugar: 25
- Sodium: 150
- Fat: 20
- Saturated Fat: 10
- Unsaturated Fat: 8
- Trans Fat: 0
- Carbohydrates: 40
- Fiber: 2
- Protein: 5
- Cholesterol: 30